Beginner’s guide · Make & create
Scratch the plate lightly,
and let the burr carry the dark line.
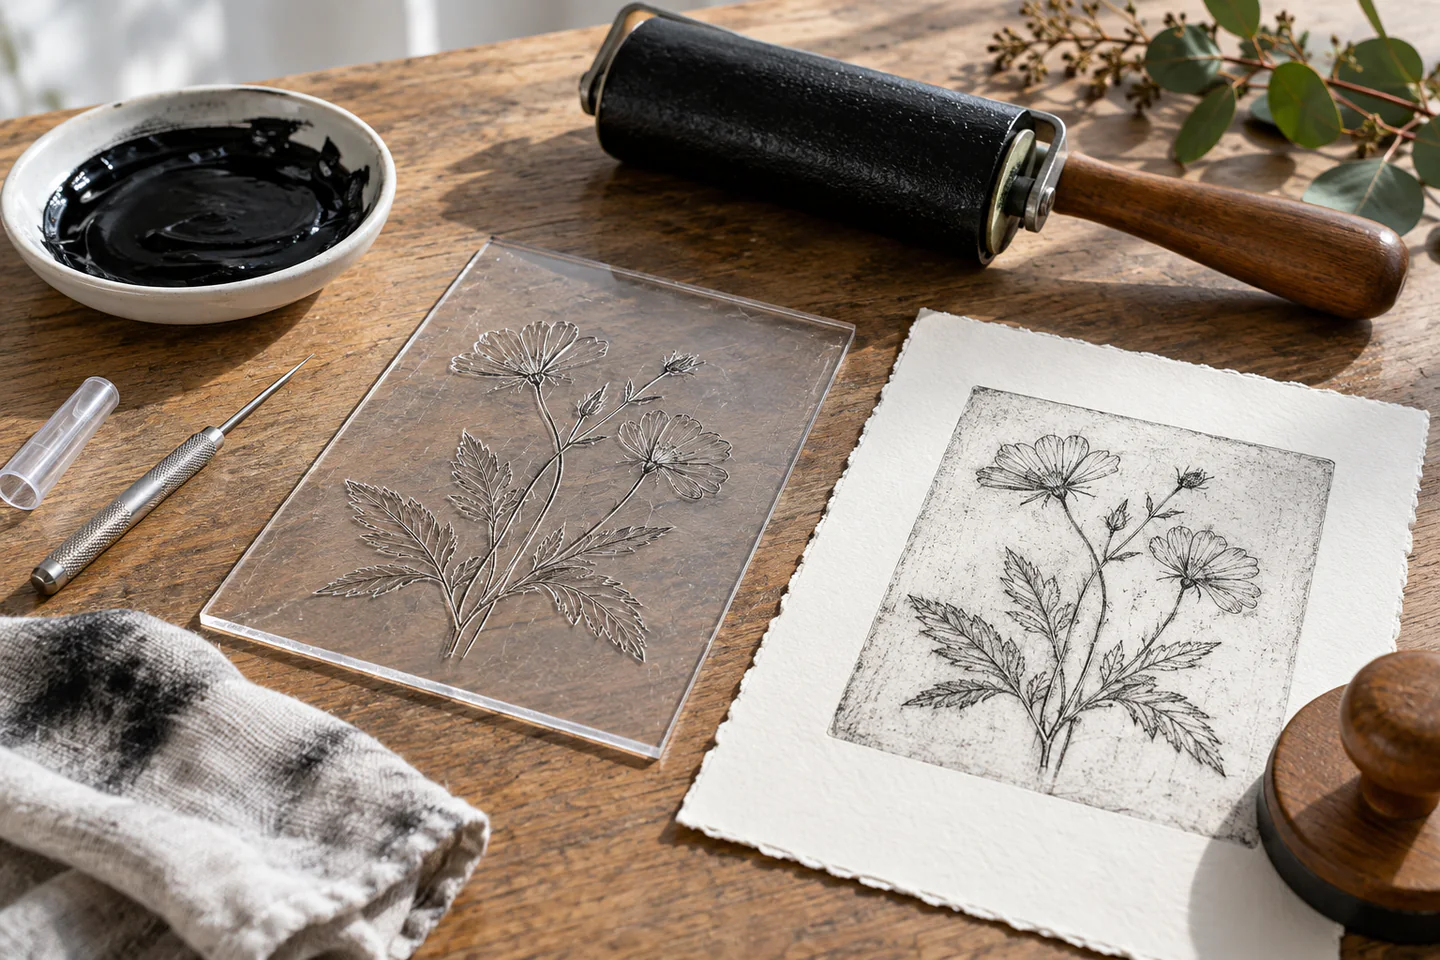
Drypoint draws into a plate with a sharp point, raising a burr that holds ink. Begin with clear plastic and hand printing.
Quick answer
Complete one a three-print botanical drypoint edition before expanding the setup
Tape a small clear drypoint plate over a simple drawing, use a purpose-made needle to pull controlled lines away from the supporting hand and test their visibility with raking light. Bevel sharp plate corners, apply suitable intaglio ink, wipe the surface while leaving ink in the scratched burr and transfer to appropriate paper with a press-free method designed for the materials.
- 01
Drypoint line comes partly from the raised burr, not only the groove cut into the plate. For a first drypoint printmaking attempt, keep the materials, measurements and sequence written beside the work. Photograph or measure the result before correcting it, because a visible record separates a technique problem from a material or setup problem.
- 02
Repeated printing flattens burr, so early impressions may be darker than later ones. For a first drypoint printmaking attempt, keep the materials, measurements and sequence written beside the work. Photograph or measure the result before correcting it, because a visible record separates a technique problem from a material or setup problem.
- 03
Clear plastic helps tracing but can have sharp corners and requires material-compatible tools and cleanup. For a first drypoint printmaking attempt, keep the materials, measurements and sequence written beside the work. Photograph or measure the result before correcting it, because a visible record separates a technique problem from a material or setup problem.
- 04
Relief ink and dry paper may work for experiments, but intaglio methods need their own ink, paper and pressure. For a first drypoint printmaking attempt, keep the materials, measurements and sequence written beside the work. Photograph or measure the result before correcting it, because a visible record separates a technique problem from a material or setup problem.
What to expect
What drypoint printmaking is really like at the start
The useful beginner controls are setup, repeatable movement and a finished sample. Creating a useful burr while wiping the surface without emptying lines is the main skill to observe before adding scale or decoration.
Needle
Too much force can skid, crack plastic or create a ragged uncontrolled burr. For a first drypoint printmaking attempt, keep the materials, measurements and sequence written beside the work. Photograph or measure the result before correcting it, because a visible record separates a technique problem from a material or setup problem.
Plate
Unsanded corners catch wiping cloth and can cut paper or skin. For a first drypoint printmaking attempt, keep the materials, measurements and sequence written beside the work. Photograph or measure the result before correcting it, because a visible record separates a technique problem from a material or setup problem.
Wiping
Removing all surface tone without emptying fine lines takes staged pressure. For a first drypoint printmaking attempt, keep the materials, measurements and sequence written beside the work. Photograph or measure the result before correcting it, because a visible record separates a technique problem from a material or setup problem.
Printing
Hand methods give different line strength from an etching press. For a first drypoint printmaking attempt, keep the materials, measurements and sequence written beside the work. Photograph or measure the result before correcting it, because a visible record separates a technique problem from a material or setup problem.
Core method
The core drypoint printmaking method
Prepare a safe plate
Round corners, tape over a simple drawing and mark a clear no-cut margin. For a first drypoint printmaking attempt, keep the materials, measurements and sequence written beside the work. Photograph or measure the result before correcting it, because a visible record separates a technique problem from a material or setup problem.
Scratch controlled lines
Pull the point away from the free hand and vary pressure only on test strokes. For a first drypoint printmaking attempt, keep the materials, measurements and sequence written beside the work. Photograph or measure the result before correcting it, because a visible record separates a technique problem from a material or setup problem.
Ink and wipe in stages
Push ink across the plate, remove the bulk and finish with clean paper or cloth as taught. For a first drypoint printmaking attempt, keep the materials, measurements and sequence written beside the work. Photograph or measure the result before correcting it, because a visible record separates a technique problem from a material or setup problem.
Print and compare
Register paper, apply even pressure and label impressions in their pulled order. For a first drypoint printmaking attempt, keep the materials, measurements and sequence written beside the work. Photograph or measure the result before correcting it, because a visible record separates a technique problem from a material or setup problem.
Useful products
Products with a clear job in the route
These two products cover distinct jobs in the beginner route; they are not a requirement to buy a bundle. Use materials already owned when they meet the same specification, and confirm every live listing before ordering.
OLFA AK-1 Art and Model Knife
A known replaceable system keeps pressure lower than a blunt disposable knife.
Canson XL Mix Media Pad, 11 × 14 inches
Sheets can be cut down for several controlled trials.
First project
Make a three-print botanical drypoint edition
Keep the project small enough to finish, inspect and repeat. The first result is evidence about material compatibility, sequence and control rather than a performance test.
- 01
Prepare the workspace and materials
Round corners, tape over a simple drawing and mark a clear no-cut margin. For a first drypoint printmaking attempt, keep the materials, measurements and sequence written beside the work. Photograph or measure the result before correcting it, because a visible record separates a technique problem from a material or setup problem.
- 02
Make the first controlled pass
Pull the point away from the free hand and vary pressure only on test strokes. For a first drypoint printmaking attempt, keep the materials, measurements and sequence written beside the work. Photograph or measure the result before correcting it, because a visible record separates a technique problem from a material or setup problem.
- 03
Check the central technique
Push ink across the plate, remove the bulk and finish with clean paper or cloth as taught. For a first drypoint printmaking attempt, keep the materials, measurements and sequence written beside the work. Photograph or measure the result before correcting it, because a visible record separates a technique problem from a material or setup problem.
- 04
Complete the structure
Register paper, apply even pressure and label impressions in their pulled order. For a first drypoint printmaking attempt, keep the materials, measurements and sequence written beside the work. Photograph or measure the result before correcting it, because a visible record separates a technique problem from a material or setup problem.
- 05
Finish, measure and record
Let the work settle or dry by the relevant material instructions, then measure, photograph and label the result. Record the one change that would make the next drypoint printmaking attempt more controlled. For a first drypoint printmaking attempt, keep the materials, measurements and sequence written beside the work. Photograph or measure the result before correcting it, because a visible record separates a technique problem from a material or setup problem.
What can wait
What can wait until the first result
Delay anything that adds cost, risk or another variable before the basic workflow has produced something you can review.
- 01
Metal plates
Copper and zinc add cost, edge work and different burr behaviour. For a first drypoint printmaking attempt, keep the materials, measurements and sequence written beside the work. Photograph or measure the result before correcting it, because a visible record separates a technique problem from a material or setup problem.
- 02
Powered engraving tool
Speed reduces direct feedback and adds debris risk. For a first drypoint printmaking attempt, keep the materials, measurements and sequence written beside the work. Photograph or measure the result before correcting it, because a visible record separates a technique problem from a material or setup problem.
- 03
Large tonal image
A simple line plate reveals wiping and pressure more clearly. For a first drypoint printmaking attempt, keep the materials, measurements and sequence written beside the work. Photograph or measure the result before correcting it, because a visible record separates a technique problem from a material or setup problem.
- 04
Shared press without induction
Studios need approved plates, blankets and safe operation. For a first drypoint printmaking attempt, keep the materials, measurements and sequence written beside the work. Photograph or measure the result before correcting it, because a visible record separates a technique problem from a material or setup problem.
Upgrade path
Add the capability you can now name
Each stage should remove a demonstrated limitation rather than make the setup look more advanced.
Clear-plastic proof
Use owned tools where possibleOne small sample and written notes
Learn the central movement and material behaviour.Small hand edition
About £20–£80A repeatable complete starter setup
Repeat the result with cleaner finish and fewer corrections.Press-printed plate
About £50–£180A selected tool or structured class
Add one technique, size or design capability.Layered intaglio work
Cost varies widelyA documented specialist workflow
Develop original work with provenance, testing and appropriate safety.Safety & care
Safety, care and respectful practice in drypoint printmaking
The practical risks are manageable when tools, materials and cultural claims remain specific and proportionate.
- Use a capped purpose-made drypoint point and always work away from the supporting hand. For a first drypoint printmaking attempt, keep the materials, measurements and sequence written beside the work. Photograph or measure the result before correcting it, because a visible record separates a technique problem from a material or setup problem.
- Round and smooth plate edges before inking or printing. For a first drypoint printmaking attempt, keep the materials, measurements and sequence written beside the work. Photograph or measure the result before correcting it, because a visible record separates a technique problem from a material or setup problem.
- Ventilate and follow ink and cleaner labels; avoid skin contact. For a first drypoint printmaking attempt, keep the materials, measurements and sequence written beside the work. Photograph or measure the result before correcting it, because a visible record separates a technique problem from a material or setup problem.
- Wear eye protection if brittle plastic is cut or snapped. For a first drypoint printmaking attempt, keep the materials, measurements and sequence written beside the work. Photograph or measure the result before correcting it, because a visible record separates a technique problem from a material or setup problem.
- Use an etching press only after studio induction and never place an unapproved plate under pressure. For a first drypoint printmaking attempt, keep the materials, measurements and sequence written beside the work. Photograph or measure the result before correcting it, because a visible record separates a technique problem from a material or setup problem.
Outside help
When outside help earns its place
A guided session is useful when equipment setup, live hand correction, heat, sharp tools or a specialist press blocks safe progress. A clear source is enough for the smallest drypoint printmaking sample.
Choose one coherent lesson that covers preparation, the central drypoint printmaking technique, finishing and common mistakes.
Ask which tools and materials are included, whether the project can be finished in the session and what safety induction is provided.
Representative UK learning and access routes checked 20 September 2026; local prices, equipment and tutor support vary.
Sources
Where the guidance came from
Authoritative and specialist guidance supports the method, terminology and safety boundaries; community discussion contributes recurring beginner problems rather than unsupported claims.
-
01
Tate · Printmaking
Art-historical definition and printmaking context.
Open source -
02
Victoria and Albert Museum · Prints
Museum collection and process context for printed works.
Open source -
03
Handprinted · Printmaking resources
UK specialist tutorials for plates, ink and hand printing.
Open source -
04
Jackson’s Art · Printmaking
Material comparisons and technique guidance.
Open source -
05
Speedball · Printmaking
Manufacturer ink and tool guidance.
Open source -
06
Reddit · r/printmaking
Recurring practitioner evidence on ink, pressure and paper.
Open source -
07
Amazon UK · AK-1 Art and Model Knife
Exact Amazon UK catalogue page or ISBN used for the recommendation; confirm current price, seller, specification and availability.
Open source -
08
Amazon UK · XL Mix Media Pad, 11 × 14 inches
Exact Amazon UK catalogue page or ISBN used for the recommendation; confirm current price, seller, specification and availability.
Open source
Guide information and links checked 20 September 2026.