Beginner's guide · Make & create
Build one small world.
Light it at the end.
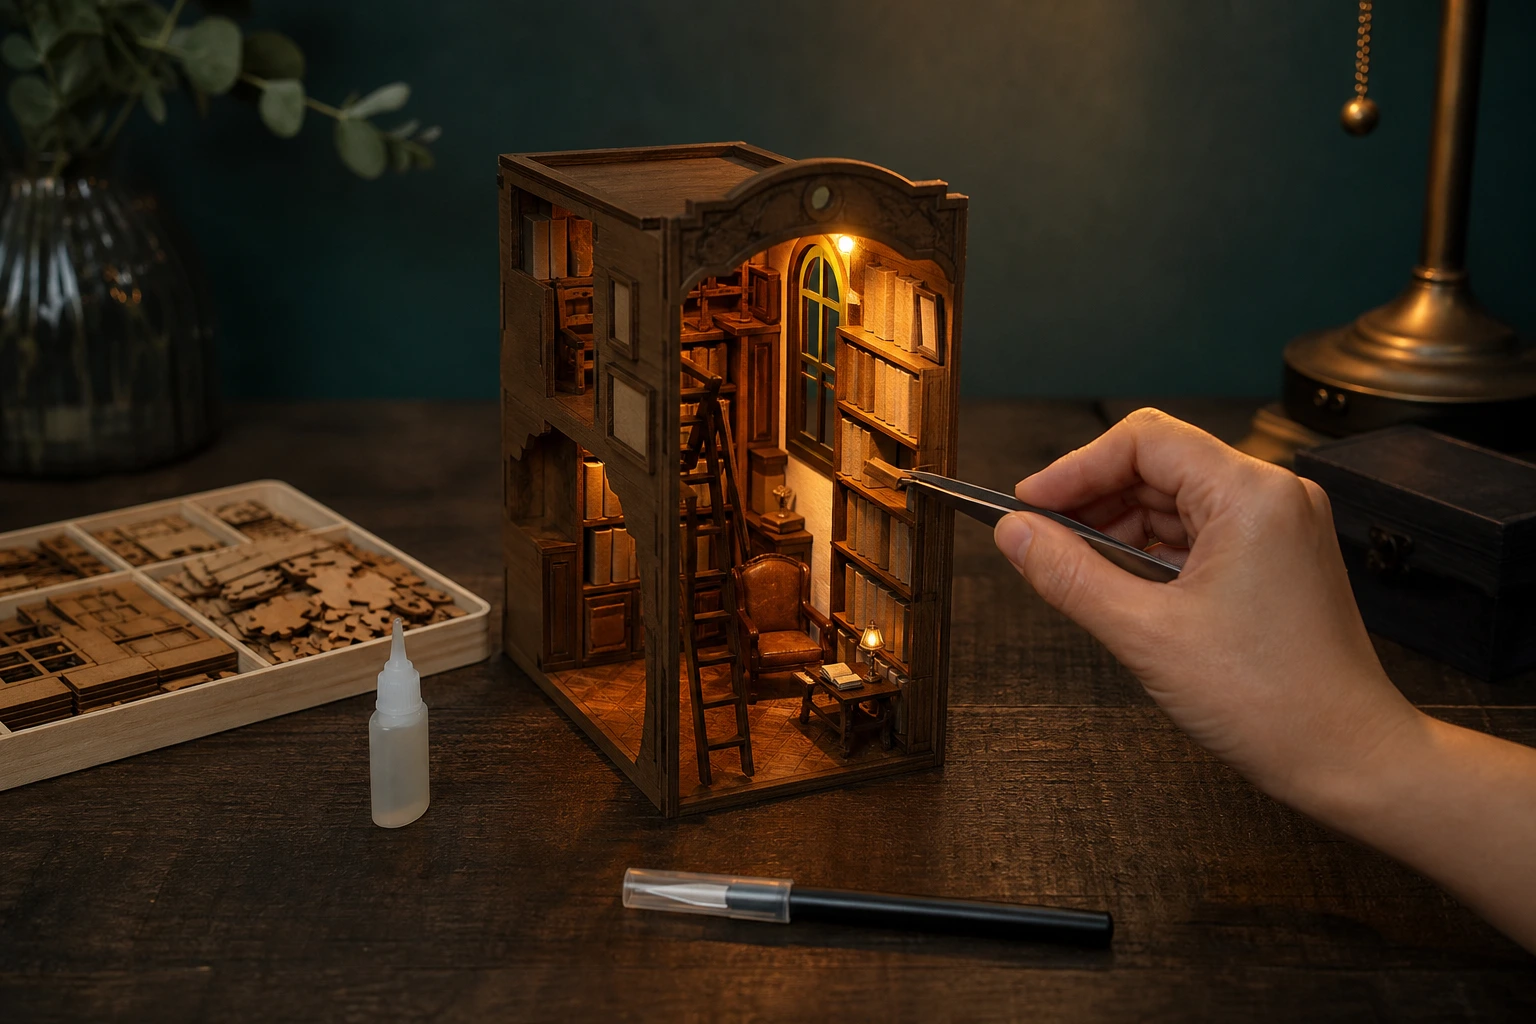
Start with a well-documented laser-cut kit, dry-fit every layer and treat its single LED as the final lesson. The first build is about sequence, clean glue and patience rather than designing a miniature room from scratch.
Quick answer
Build one small world.
Choose a compact kit with clear illustrated instructions and a modest part count. Inventory the sheets before cutting anything free, organise pieces by step, then dry-fit each small assembly before adding a pin-sized amount of glue.
- 01
The CUTEBEE Owl Bookstore is repeatedly suggested as a manageable first kit because the structure, instructions and single light are relatively straightforward.
- 02
Use a fine-tip craft glue for wood and paper unless the kit specifies a different adhesive; more glue usually means more visible residue.
- 03
Fine tweezers help with tiny paper, wire and furniture parts, but fingers remain better for broad panels and fragile printed surfaces.
- 04
Do not rush the light test. Fit batteries only as directed, keep bare wire ends apart and confirm the switch works before the final wall closes.
What to expect
What the first attempts really involve
The first project is useful because it exposes the decisions that shopping pages tend to hide.
Sequence
Most failures begin several steps earlier than they appear. A backwards panel or trapped wire can prevent the shell from closing much later.
Dry fitting
Laser-cut tabs are not always identical. Test the orientation and contact points before glue removes the option to adjust them.
Tiny parts
Paper leaves, books and furniture details take longer than their size suggests. A shallow tray stops them disappearing from the table.
Lighting
The wiring is usually low voltage and simple, but routing matters. A pinched wire or buried battery box turns a decorative build into a repair job.
Finish quality
Close viewing exposes glue shine, fingerprints and fibres. Clean hands, small adhesive amounts and complete drying time make the biggest difference.
Plan the build
Treat the instructions as a build map
Inspect before assembling
Open the box over a clear table and compare every sheet, wire, paper piece and bag of fittings with the parts list. Photograph the laid-out contents. If a numbered piece is absent or damaged, it is easier to contact the seller before surrounding parts are glued in place.
Organise by the next few steps
Do not remove every laser-cut component at once. Release only the pieces needed for the current subassembly, sand a stubborn tab very lightly if the instructions allow it, and keep offcuts until the model is complete. Some seemingly empty shapes are spacers or templates.
Dry-fit, mark, then glue
Assemble the parts without adhesive, check the printed face and the direction of tabs, and make a tiny pencil mark where it will be hidden. Apply a fine line or dot to one contact surface. Hold the joint until it grips, then let it cure on a flat surface instead of testing it repeatedly.
Starter products
One kit and two genuinely useful hand tools
The selected kit provides the structure, printed details and lighting lesson. Precision glue and fine tweezers reduce the two most common sources of frustration: flooded joints and inaccessible small parts. Batteries and any kit-specific adhesive exclusions still need checking on the live listing and in the box.
CUTEBEE Owl Bookstore Book Nook Kit
The kit keeps the first attempt focused on assembly and lighting rather than scale design and material sourcing.
Bearly Art Precision Craft Glue Mini, 2 fl oz
Fine tips make it easier to keep adhesive on hidden contact faces instead of glossy windows and printed artwork.
MMOBIEL Seven-Piece Precision Tweezer Set
Different tip angles help place paper leaves, wire and miniature fittings after the surrounding structure limits finger access.
First build
Build the Owl Bookstore in controlled stages
The aim is a square shell, a working light and clean visible surfaces. Decorative perfection can wait until the basic build order feels natural.
- 01
Read the whole sequence
Scan every instruction page once. Identify when the lighting, rear panel and dust cover become inaccessible.
- 02
Inventory and sort
Match sheets and loose components to the parts list. Keep tiny pieces in labelled cups or a compartment tray.
- 03
Make the first subassembly dry
Test a shelf or small wall section without glue. Confirm printed faces, tab direction and the final viewing angle.
- 04
Glue sparingly
Use the precision tip or a toothpick to place a small amount on hidden contact edges. Remove squeeze-out immediately with the method recommended for the adhesive.
- 05
Route and test the light
Follow the diagram exactly, protect wire bends and test the switch before enclosing the route. Remove batteries while making later adjustments.
- 06
Square the shell
Dry-fit the outer walls, check the base sits flat and only then glue in the instructed order. Let the structure cure before fitting the final cover.
- 07
Clean and display
Lift dust with a soft brush, check the battery compartment remains reachable and place the nook between stable books away from moisture and direct sun.
Troubleshooting
Fix the fit before forcing the part
A tab should not need violence
If a part will not seat, compare its number and orientation with the diagram. Remove laser-cut nibs with a fine abrasive only when necessary. Forcing thin plywood across the grain can split a visible edge; enlarging every slot can make the finished shell loose.
Cloudy glue is usually too much glue
Use a clean fine applicator and keep adhesive away from transparent windows. If a joint needs clamping, low-tack tape or a small clip can help, but protect printed paper from dents and lifted ink. Let one joint set before adding the load of the next wall.
A dead light needs a simple test order
Check battery orientation, the switch position and whether the battery insulating tab has been removed. Inspect connections for separated or touching bare ends without pulling the wire. If the kit uses a sealed lighting module, replacement is safer than improvised mains-powered wiring.
Skip for now
What can wait
A first kit already contains enough decisions. Add tools only when a repeated task proves that the tool would solve it.
- 01
A large miniature tool set
Many bundled tools duplicate household scissors, a ruler and simple clips. Learn which operations are actually awkward before buying a case of gadgets.
- 02
A rotary tool
Fast abrasive tools can split thin plywood, damage print and throw dust. Hand fitting is slower but far easier to control on a first kit.
- 03
Extra LEDs and soldering equipment
The included single-light circuit teaches routing and access. Custom lighting is a separate electronics project once the basic enclosure is understood.
- 04
A fully scratch-built scene
Designing scale, structure, lighting and artwork at once hides which skill caused a problem. Finish one documented kit before designing a shell.
- 05
Several unopened kits
Build time and tolerance for repetitive miniature work are personal. One finished nook is better evidence than a shelf of aspirational boxes.
Upgrade path
What a better setup changes
The useful path moves from reliable assembly to selective customisation, then to a structure designed around a personal scene.
First lit kit
About £45–£60Compact kit + precision glue + tweezers
Learn part order, dry fitting, clean joints and a simple light route.Cleaner repeat builds
About £15–£35 moreCutting mat + fine knife + small clamps
Trim paper and tabs more accurately while protecting the table.A customised kit
Project dependentPaint + replacement paper + added props
Change colour, signage and detail while retaining a proven structure.Scratch-built nook
About £40–£150Scale plan + sheet material + safe low-voltage lighting
Control dimensions and story, with far more measuring and prototype work.Safety
Work safely from the first attempt
The materials are small rather than harmless. Blades, coin cells, adhesives and fine dust need deliberate handling.
- Keep coin-cell batteries and loose miniature parts away from children and pets; swallowed button batteries are a medical emergency.
- Cut on a stable mat, away from the supporting hand, and cap or retract blades immediately after use.
- Ventilate adhesive and paint work as their labels require, and do not mix products whose compatibility is unknown.
- Sand only the minimum needed, avoid blowing dust across the table and clean residue with a damp cloth or suitable vacuum.
- Use only the supplied or correctly specified low-voltage lighting parts; never improvise a mains connection inside a paper-and-wood model.
Classes
When outside help is useful
A class is optional because the kit supplies the sequence. Outside help becomes useful for scratch-building, miniature electrics or solving a stalled model in person.
Use a video for the exact kit when a flat diagram does not show wire routing or the orientation of a layered detail.
Look for a small finished project, included materials and clear information about whether knives or soldering are involved.
Most useful after one kit, when scale planning, material choice and custom lighting have become specific questions.
Representative UK miniature and model-making availability checked 27 July 2026; dedicated book-nook classes remain uncommon.
Sources
Sources and checking notes
Recent builder discussions shaped the small-tool list and the choice of a manageable first kit. Manufacturer-style instructions and electrical-safety guidance informed the assembly and lighting boundaries.
-
01
r/booknooks · Book nook for a UK beginner
Recent UK discussion repeatedly describing Owl Bookstore as a clear, manageable first build.
Open source -
02
r/booknooks · Advice and recommendations for a beginner
Community advice on kit choice, glue application, tweezers and cutting mats.
Open source -
03
r/booknooks · Tools for a first kit
Builder discussion confirming the recurring glue, scissors and tweezer essentials.
Open source -
04
r/booknooks · Community guide to tools and brands
Detailed practitioner guide covering precision glue, scalpels, tweezers, clamps and reseller caution.
Open source -
05
r/booknooks · Kits and brands guide
Community overview of established kit brands and the risk of copied or resold kits.
Open source -
06
Book Nook World · Beginner kit guide
General build sequence, tool and workspace guidance for a first miniature kit.
Open source -
07
Amazon UK · CUTEBEE Owl Bookstore
Exact pre-cut miniature book-nook kit selected as the first project.
Open source -
08
Amazon UK · Bearly Art Precision Craft Glue Mini
Exact fine-tip craft adhesive selected for controlled wood and paper assembly.
Open source -
09
Amazon UK · MMOBIEL precision tweezers
Exact seven-piece fine tweezer set selected for small parts and wire placement.
Open source -
10
NHS · Button batteries
Urgent safety context for keeping coin cells away from children.
Open source
Guide information and links checked 27 July 2026.