Beginner’s guide · Make & create
Build thin layers,
let each one dry.
Papier-mâché becomes reliable through modest forms, thin adhesive layers and full drying. Start with a small bowl or animal kit before large masks and furniture.
Quick answer
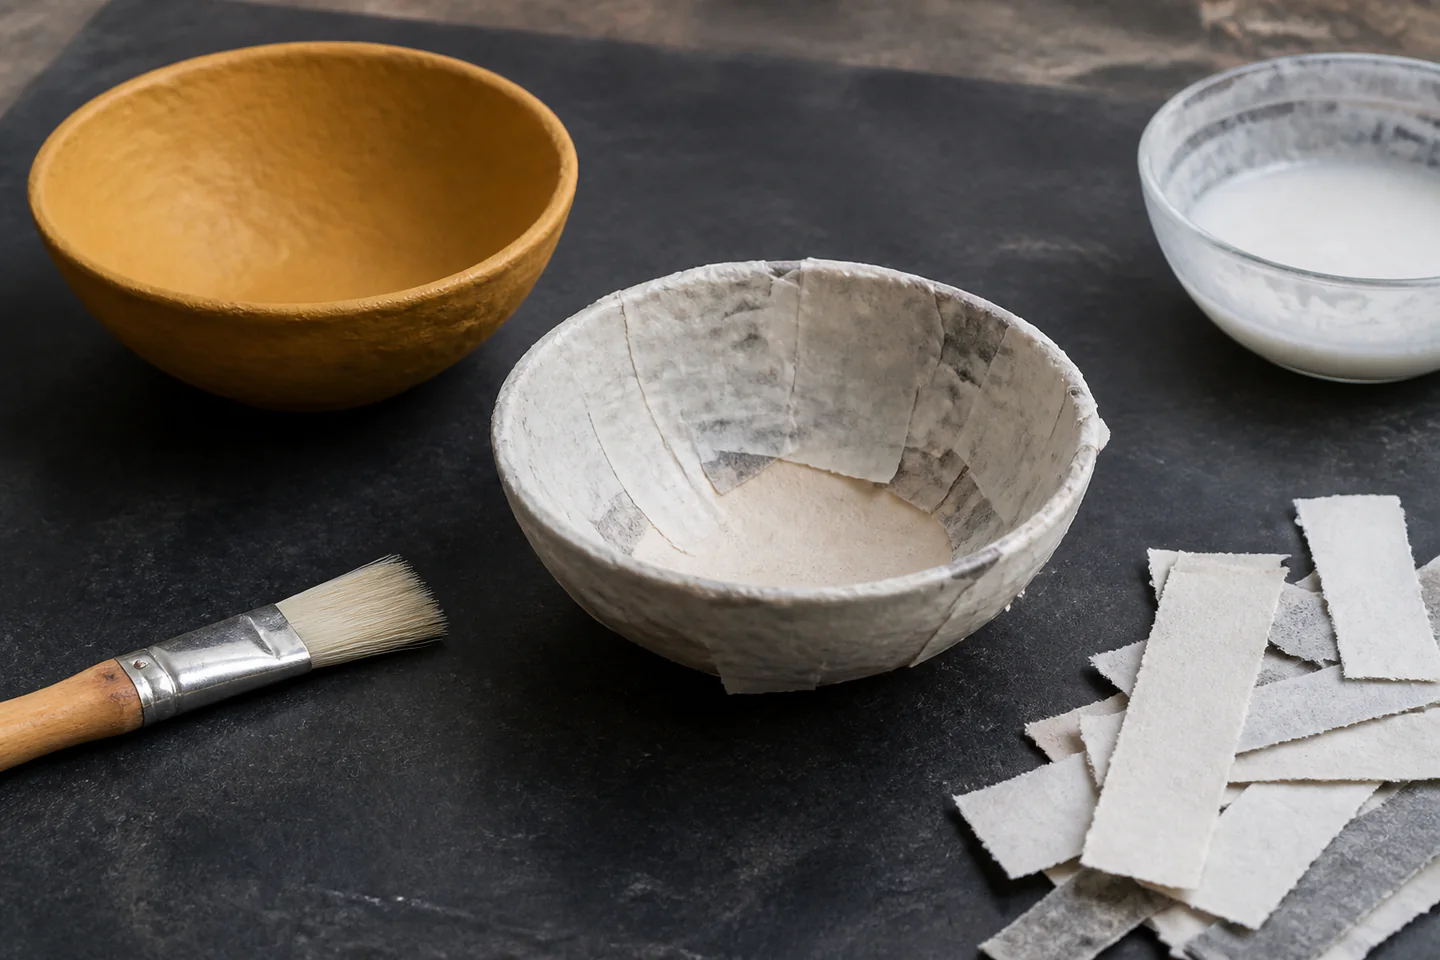
Make a small thin-walled form and schedule the drying
Protect the table, choose either torn paper strips with a suitable paste or a ready papier-mâché pulp and make one small open form. Apply thin overlapping layers, smooth out trapped air and stop before the walls become heavy and saturated. Dry with airflow at room conditions until the piece is firm and no longer cool or damp, then add another layer only if required. Prime and paint after the entire structure is dry.
- 01
Choose torn paper strips or prepared papier-mâché pulp for the first result and resist substituting several unfamiliar materials at once. Record what you used on the first attempt so the result can be repeated or changed for a reason.
- 02
Make thin coverage and complete airflow drying visible with a small test before committing the full project. Record what you used on the first attempt so the result can be repeated or changed for a reason.
- 03
Change one variable between attempts and keep the preparation otherwise consistent. Record what you used on the first attempt so the result can be repeated or changed for a reason.
- 04
Inspect the work at each reversible stage instead of waiting until priming and painting. Record what you used on the first attempt so the result can be repeated or changed for a reason.
- 05
Finish one modest result and note the actual time, material use and recurring difficulty. Record what you used on the first attempt so the result can be repeated or changed for a reason.
What to expect
Drying time is part of the build
The visible modelling is quick; trapped moisture, thick paste and rushed paint cause odour, mould, softness and cracks later.
Method
Strip laminate follows a support form; pulp models more freely but holds more moisture and can shrink. In papier-mâché, this is worth checking deliberately rather than trying to correct it after the next stage.
Paste
Excess adhesive does not make a stronger piece when it prevents layers drying. In papier-mâché, this is worth checking deliberately rather than trying to correct it after the next stage.
Support
Balloons, bowls and armatures need release planning and must not be sealed inside while damp. In papier-mâché, this is worth checking deliberately rather than trying to correct it after the next stage.
Drying
Surface dryness is not proof that thick areas are dry. Air must reach all sides. In papier-mâché, this is worth checking deliberately rather than trying to correct it after the next stage.
Finish
Paint and varnish slow moisture movement, so they belong only on a thoroughly dry object. In papier-mâché, this is worth checking deliberately rather than trying to correct it after the next stage.
Core method
Choose one method and keep the walls breathable
Prepare form and release
Cover the workspace, choose a stable mould or simple armature and test how the dry piece will be removed. In papier-mâché, this is worth checking deliberately rather than trying to correct it after the next stage.
Apply thin layers
Tear rather than cut strip edges for blending, remove excess paste and overlap consistently. In papier-mâché, this is worth checking deliberately rather than trying to correct it after the next stage.
Dry from all sides
Set the piece on a rack, rotate it and allow enough time before judging stiffness. In papier-mâché, this is worth checking deliberately rather than trying to correct it after the next stage.
Finish only when dry
Trim rough edges safely, add a compatible primer and use thin paint coats with their stated cure time. In papier-mâché, this is worth checking deliberately rather than trying to correct it after the next stage.
Useful products
Products with a clear job in the setup
The elephant kit is a bounded strip-and-decoration project. Creativ Company pulp and Scola powder are two alternative modelling materials; choose one method rather than combining all three.
Décopatch Decopatch Mini Papier-Mâché Elephant Kit
The small object focuses on adhesive coverage and decoration without building a wet armature.
Creativ Company Papier-Mâché Pulp 400 g
A named measured material makes repeat batches easier to compare.
Scola Artmix Ready-Mix Papier-Mâché Powder 140 g
The size limits waste while testing whether the pulp method is enjoyable.
First project
Make one shallow trinket bowl
An open shallow mould gives air access, a clear release point and manageable drying depth.
- 01
Protect and prepare
Cover the table, choose a smooth bowl mould and add the release layer specified by the method. In papier-mâché, this is worth checking deliberately rather than trying to correct it after the next stage.
- 02
Tear short strips
Prepare manageable paper pieces and a modest amount of paste. In papier-mâché, this is worth checking deliberately rather than trying to correct it after the next stage.
- 03
Lay the first thin coat
Overlap pieces, smooth bubbles and keep the rim even without saturating the form. In papier-mâché, this is worth checking deliberately rather than trying to correct it after the next stage.
- 04
Dry completely
Place where air reaches the surface, rotate when stable and wait until no cool damp areas remain. In papier-mâché, this is worth checking deliberately rather than trying to correct it after the next stage.
- 05
Add strength selectively
Apply another thin layer only where the dry shell genuinely flexes. In papier-mâché, this is worth checking deliberately rather than trying to correct it after the next stage.
- 06
Release and finish
Ease from the mould, dry the inside, trim safely and paint in thin compatible coats. In papier-mâché, this is worth checking deliberately rather than trying to correct it after the next stage.
What can wait
What can wait until the first result
Large sculptures multiply drying, armature and structural problems before the behaviour of one thin shell is known.
- 01
Wearable mask
Fit, vision, breathing, skin contact and fire behaviour need more planning. In papier-mâché, this is worth checking deliberately rather than trying to correct it after the next stage.
- 02
Large sealed sculpture
Moisture can remain trapped deep inside and support may collapse. In papier-mâché, this is worth checking deliberately rather than trying to correct it after the next stage.
- 03
Outdoor object
Ordinary papier-mâché and paint are not durable weatherproof construction. In papier-mâché, this is worth checking deliberately rather than trying to correct it after the next stage.
- 04
Heavy varnish coat
Sealing a damp piece preserves the moisture problem. In papier-mâché, this is worth checking deliberately rather than trying to correct it after the next stage.
- 05
Motorised sanding
Dust control and thin walls make hand finishing the safer first route. In papier-mâché, this is worth checking deliberately rather than trying to correct it after the next stage.
Upgrade path
Upgrade the repeated limitation
Add scale only after the material ratio and full drying time are understood in the actual room.
Decorated mini form
About £8–£18Small kit and brush
Learn adhesive control.Shallow bowl
About £10–£30Strips or pulp and mould
Build and release a shell.Armature sculpture
About £25–£80Wire/card support and planned layers
Control shape and drying.Large installation
About £80–£400+Engineered armature and drying space
Manage weight and structure.Safety & care
Control dust, moisture and material labels
The craft is family-friendly only when dry powders, adhesives, paints and slow-drying forms are handled according to their exact instructions.
- Avoid inhaling powdered pulp or sanding dust; mix gently with ventilation and use specified protection. Follow the current instructions supplied with the exact material, tool or living specimen.
- Wash hands after paste and paint, and never use craft bowls for food. Follow the current instructions supplied with the exact material, tool or living specimen.
- Discard work that develops mould, persistent odour or unexplained discoloration rather than sealing it. Follow the current instructions supplied with the exact material, tool or living specimen.
- Keep drying pieces away from flames, heaters, blocked exits and damp bedrooms. Follow the current instructions supplied with the exact material, tool or living specimen.
- Use only child-appropriate products under supervision and keep small armature parts contained. Follow the current instructions supplied with the exact material, tool or living specimen.
Outside help
When outside help earns its place
A complete beginner tutorial is enough for the first controlled attempt. A class becomes useful when armature building, masks or large sculptural forms becomes the goal.
Follow one method using torn paper strips or prepared papier-mâché pulp, including preparation and finishing rather than only the photogenic middle stage.
Check whether materials, troubleshooting, priming and painting and a finished take-home result are included.
Representative UK learning options checked 28 August 2026; local prices, access, materials and tutor support vary.
Sources
Where the guidance came from
The method is grounded in specialist and public guidance, then checked against recurring beginner questions and the exact products linked here.
-
01
Tate Kids · papier-mâché
Accessible museum-led making method.
Open source -
02
Victoria and Albert Museum · paper
Material context for paper objects.
Open source -
03
Health and Safety Executive · COSHH
UK guidance on dusts and craft substances.
Open source -
04
Royal Society for Public Health · damp and mould
Health context for persistent damp and mould.
Open source -
05
Reddit · r/papermache
Community evidence on paste, armatures, cracking and drying.
Open source -
06
Amazon UK · Decopatch Mini Papier-Mâché Elephant Kit
Exact product catalogue page or ISBN used for the recommendation; current price, seller, specification and availability should be confirmed.
Open source -
07
Amazon UK · Papier-Mâché Pulp 400 g
Exact product catalogue page or ISBN used for the recommendation; current price, seller, specification and availability should be confirmed.
Open source -
08
Amazon UK · Artmix Ready-Mix Papier-Mâché Powder 140 g
Exact product catalogue page or ISBN used for the recommendation; current price, seller, specification and availability should be confirmed.
Open source
Guide information and links checked 28 August 2026.