Beginner’s guide · Make & create
Build the plate from texture,
then seal it before the ink decides everything.
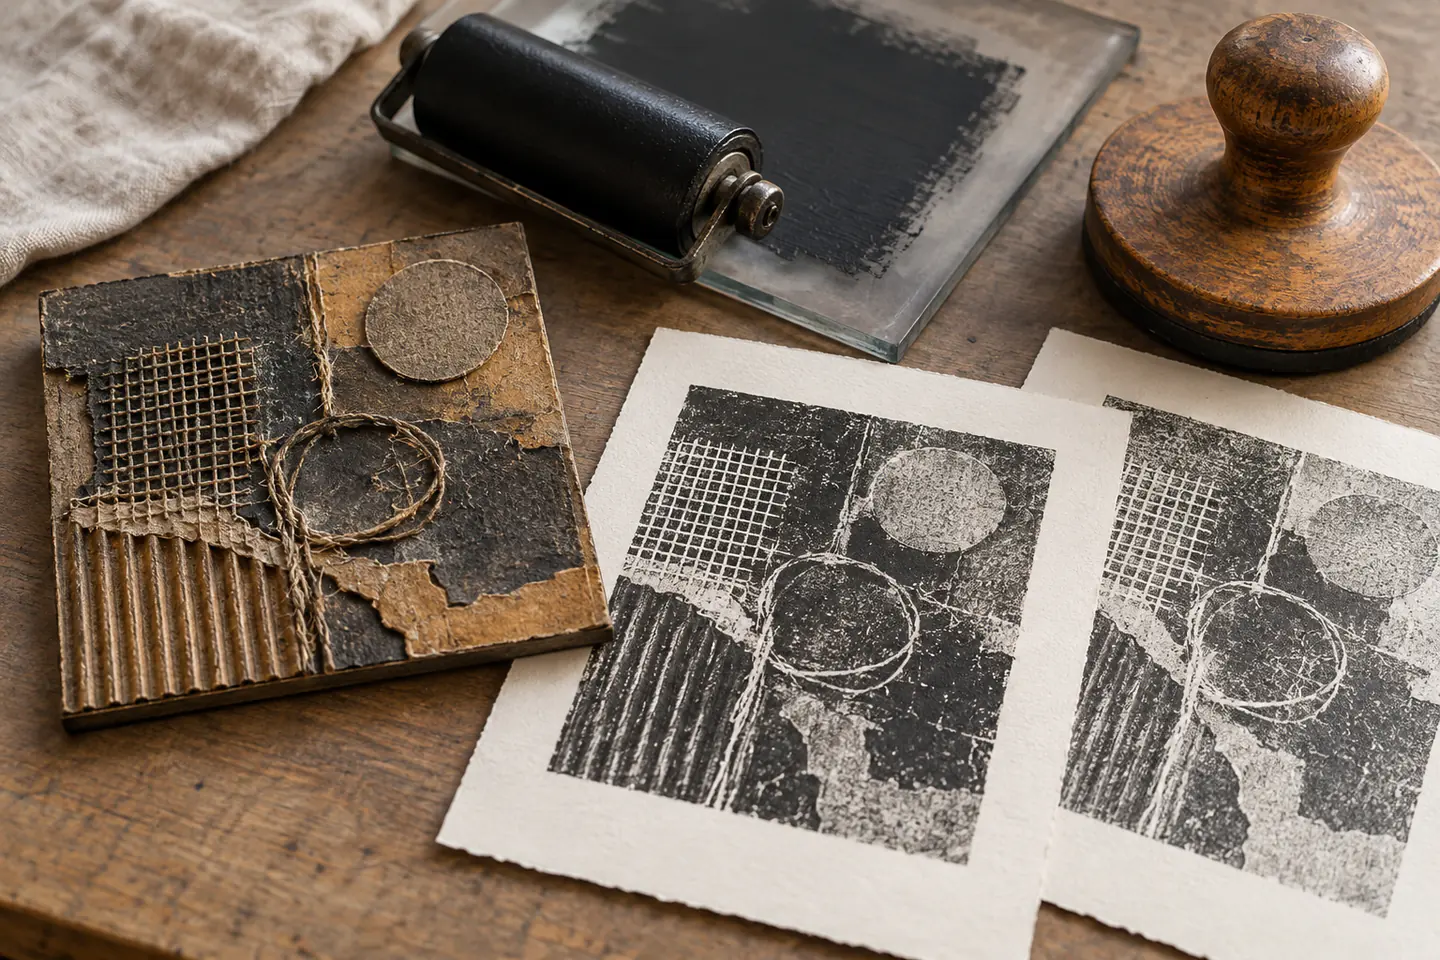
Collagraph printing uses a collage plate of textured materials. Begin with one small sealed plate and hand-burnished proofs.
Quick answer
Complete one a postcard-sized textured landscape plate before expanding the setup
Use thick card as a small plate and attach low-relief materials such as string, textured paper and mesh with a compatible adhesive. Keep details broad, seal the whole dry plate consistently, roll a thin even ink film, lay paper without sliding and transfer pressure with a baren or spoon. Number three proofs and annotate the inking change between them.
- 01
A collagraph plate is a printing matrix, so every raised and recessed material affects inking and pressure. For a first collagraph printing attempt, keep the materials, measurements and sequence written beside the work. Photograph or measure the result before correcting it, because a visible record separates a technique problem from a material or setup problem.
- 02
Unsealed absorbent card drinks ink and can swell or delaminate during cleanup. For a first collagraph printing attempt, keep the materials, measurements and sequence written beside the work. Photograph or measure the result before correcting it, because a visible record separates a technique problem from a material or setup problem.
- 03
Very deep texture may look attractive on the plate but fail to contact paper by hand. For a first collagraph printing attempt, keep the materials, measurements and sequence written beside the work. Photograph or measure the result before correcting it, because a visible record separates a technique problem from a material or setup problem.
- 04
Relief inking and intaglio wiping are different routes; a first plate should choose one. For a first collagraph printing attempt, keep the materials, measurements and sequence written beside the work. Photograph or measure the result before correcting it, because a visible record separates a technique problem from a material or setup problem.
What to expect
What collagraph printing is really like at the start
The useful beginner controls are setup, repeatable movement and a finished sample. Balancing texture depth with an even ink film and pressure is the main skill to observe before adding scale or decoration.
Adhesive
Raised corners and thick glue ridges print whether intended or not. For a first collagraph printing attempt, keep the materials, measurements and sequence written beside the work. Photograph or measure the result before correcting it, because a visible record separates a technique problem from a material or setup problem.
Seal
Uneven coating changes absorbency across the plate. For a first collagraph printing attempt, keep the materials, measurements and sequence written beside the work. Photograph or measure the result before correcting it, because a visible record separates a technique problem from a material or setup problem.
Ink
Too much fills texture and smears edges; too little leaves broken areas. For a first collagraph printing attempt, keep the materials, measurements and sequence written beside the work. Photograph or measure the result before correcting it, because a visible record separates a technique problem from a material or setup problem.
Pressure
Rubbing only the centre misses edges and can shift the paper. For a first collagraph printing attempt, keep the materials, measurements and sequence written beside the work. Photograph or measure the result before correcting it, because a visible record separates a technique problem from a material or setup problem.
Core method
The core collagraph printing method
Plan broad texture zones
Arrange materials dry and limit height differences before gluing. For a first collagraph printing attempt, keep the materials, measurements and sequence written beside the work. Photograph or measure the result before correcting it, because a visible record separates a technique problem from a material or setup problem.
Adhere and seal fully
Flatten loose edges, dry completely and coat front and sides by the chosen method. For a first collagraph printing attempt, keep the materials, measurements and sequence written beside the work. Photograph or measure the result before correcting it, because a visible record separates a technique problem from a material or setup problem.
Roll a controlled film
Test the brayer sound and appearance on a separate inking slab. For a first collagraph printing attempt, keep the materials, measurements and sequence written beside the work. Photograph or measure the result before correcting it, because a visible record separates a technique problem from a material or setup problem.
Register and burnish
Use corner marks, lower paper once and apply overlapping even pressure across the back. For a first collagraph printing attempt, keep the materials, measurements and sequence written beside the work. Photograph or measure the result before correcting it, because a visible record separates a technique problem from a material or setup problem.
Useful products
Products with a clear job in the route
These two products cover distinct jobs in the beginner route; they are not a requirement to buy a bundle. Use materials already owned when they meet the same specification, and confirm every live listing before ordering.
Falling in Art Soft Rubber Brayer Rollers, 10 cm and 6 cm
Two widths suit both a plate and a small correction without a press.
Speedball Water-Soluble Block Printing Ink, Black, 75 ml
A dedicated printmaking ink is easier to roll consistently than improvised paint.
First project
Make a postcard-sized textured landscape plate
Keep the project small enough to finish, inspect and repeat. The first result is evidence about material compatibility, sequence and control rather than a performance test.
- 01
Prepare the workspace and materials
Arrange materials dry and limit height differences before gluing. For a first collagraph printing attempt, keep the materials, measurements and sequence written beside the work. Photograph or measure the result before correcting it, because a visible record separates a technique problem from a material or setup problem.
- 02
Make the first controlled pass
Flatten loose edges, dry completely and coat front and sides by the chosen method. For a first collagraph printing attempt, keep the materials, measurements and sequence written beside the work. Photograph or measure the result before correcting it, because a visible record separates a technique problem from a material or setup problem.
- 03
Check the central technique
Test the brayer sound and appearance on a separate inking slab. For a first collagraph printing attempt, keep the materials, measurements and sequence written beside the work. Photograph or measure the result before correcting it, because a visible record separates a technique problem from a material or setup problem.
- 04
Complete the structure
Use corner marks, lower paper once and apply overlapping even pressure across the back. For a first collagraph printing attempt, keep the materials, measurements and sequence written beside the work. Photograph or measure the result before correcting it, because a visible record separates a technique problem from a material or setup problem.
- 05
Finish, measure and record
Let the work settle or dry by the relevant material instructions, then measure, photograph and label the result. Record the one change that would make the next collagraph printing attempt more controlled. For a first collagraph printing attempt, keep the materials, measurements and sequence written beside the work. Photograph or measure the result before correcting it, because a visible record separates a technique problem from a material or setup problem.
What can wait
What can wait until the first result
Delay anything that adds cost, risk or another variable before the basic workflow has produced something you can review.
- 01
Deep found objects
They prevent even paper contact and may damage equipment. For a first collagraph printing attempt, keep the materials, measurements and sequence written beside the work. Photograph or measure the result before correcting it, because a visible record separates a technique problem from a material or setup problem.
- 02
Press pressure
Learn plate strength and hand printing before using a shared press. For a first collagraph printing attempt, keep the materials, measurements and sequence written beside the work. Photograph or measure the result before correcting it, because a visible record separates a technique problem from a material or setup problem.
- 03
Intaglio wiping
It needs different ink, damp paper and plate sealing. For a first collagraph printing attempt, keep the materials, measurements and sequence written beside the work. Photograph or measure the result before correcting it, because a visible record separates a technique problem from a material or setup problem.
- 04
Large edition
The first plate should reveal wear and repeatability. For a first collagraph printing attempt, keep the materials, measurements and sequence written beside the work. Photograph or measure the result before correcting it, because a visible record separates a technique problem from a material or setup problem.
Upgrade path
Add the capability you can now name
Each stage should remove a demonstrated limitation rather than make the setup look more advanced.
Hand-printed proof
Use owned tools where possibleOne small sample and written notes
Learn the central movement and material behaviour.Small numbered edition
About £20–£80A repeatable complete starter setup
Repeat the result with cleaner finish and fewer corrections.Intaglio collagraph
About £50–£180A selected tool or structured class
Add one technique, size or design capability.Press-based multi-plate work
Cost varies widelyA documented specialist workflow
Develop original work with provenance, testing and appropriate safety.Safety & care
Safety, care and respectful practice in collagraph printing
The practical risks are manageable when tools, materials and cultural claims remain specific and proportionate.
- Cut plate materials on a mat with fingers behind the blade path. For a first collagraph printing attempt, keep the materials, measurements and sequence written beside the work. Photograph or measure the result before correcting it, because a visible record separates a technique problem from a material or setup problem.
- Ventilate and follow adhesive, sealant and ink labels. For a first collagraph printing attempt, keep the materials, measurements and sequence written beside the work. Photograph or measure the result before correcting it, because a visible record separates a technique problem from a material or setup problem.
- Keep print tools and cleanup containers separate from food use. For a first collagraph printing attempt, keep the materials, measurements and sequence written beside the work. Photograph or measure the result before correcting it, because a visible record separates a technique problem from a material or setup problem.
- Use only plates approved by a studio before placing them in a shared press. For a first collagraph printing attempt, keep the materials, measurements and sequence written beside the work. Photograph or measure the result before correcting it, because a visible record separates a technique problem from a material or setup problem.
- Dry prints flat away from children, pets and heat sources. For a first collagraph printing attempt, keep the materials, measurements and sequence written beside the work. Photograph or measure the result before correcting it, because a visible record separates a technique problem from a material or setup problem.
Outside help
When outside help earns its place
A guided session is useful when equipment setup, live hand correction, heat, sharp tools or a specialist press blocks safe progress. A clear source is enough for the smallest collagraph printing sample.
Choose one coherent lesson that covers preparation, the central collagraph printing technique, finishing and common mistakes.
Ask which tools and materials are included, whether the project can be finished in the session and what safety induction is provided.
Representative UK learning and access routes checked 20 September 2026; local prices, equipment and tutor support vary.
Sources
Where the guidance came from
Authoritative and specialist guidance supports the method, terminology and safety boundaries; community discussion contributes recurring beginner problems rather than unsupported claims.
-
01
Tate · Printmaking
Art-historical definition and printmaking context.
Open source -
02
Victoria and Albert Museum · Prints
Museum collection and process context for printed works.
Open source -
03
Handprinted · Printmaking resources
UK specialist tutorials for plates, ink and hand printing.
Open source -
04
Jackson’s Art · Printmaking
Material comparisons and technique guidance.
Open source -
05
Speedball · Printmaking
Manufacturer ink and tool guidance.
Open source -
06
Reddit · r/printmaking
Recurring practitioner evidence on ink, pressure and paper.
Open source -
07
Amazon UK · Soft Rubber Brayer Rollers, 10 cm and 6 cm
Exact Amazon UK catalogue page or ISBN used for the recommendation; confirm current price, seller, specification and availability.
Open source -
08
Amazon UK · Water-Soluble Block Printing Ink, Black, 75 ml
Exact Amazon UK catalogue page or ISBN used for the recommendation; confirm current price, seller, specification and availability.
Open source
Guide information and links checked 20 September 2026.