Beginner's guide · Make & build
Change one row.
Understand the whole board.
Begin with a known working hot-swappable keyboard, compatible switches and keycaps that really match its layout. Testing a few keys first teaches feel, sound and fit without turning the first evening into soldering or fault-finding.
Quick answer
Change one row.
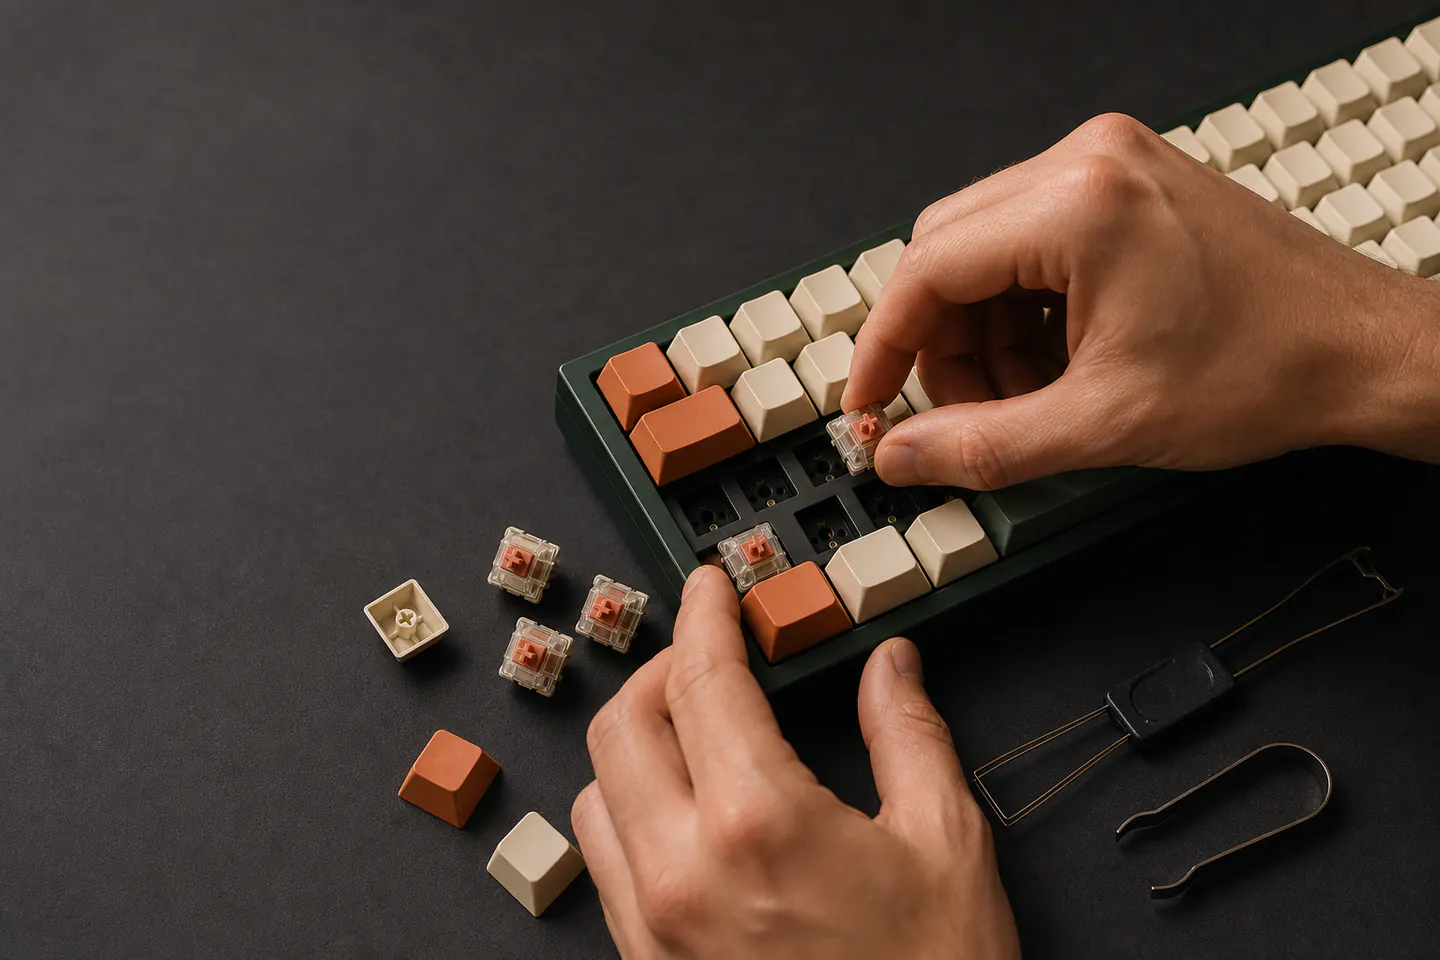
The least frustrating first build is a working hot-swappable mechanical keyboard whose physical layout is already correct for you. Photograph the original key positions, unplug it, remove one small row of keycaps and switches, inspect every switch pin, press replacements in squarely and test every changed key before continuing.
- 01
UK ISO and US ANSI are physical layouts, not software settings. The tall ISO Enter key and the extra key beside the left Shift require a matching plate, PCB and keycap set.
- 02
MX-style three-pin and five-pin switches fit many hot-swap sockets, but optical and Hall-effect switches are different systems and must not be assumed compatible.
- 03
Switch feel is easier to judge in the real keyboard than from marketing labels. Fit a small sample before buying enough switches for a whole board.
- 04
A barebones kit saves duplicated keycaps and switches, but adds decisions about stabilisers, firmware, case layout and fault diagnosis. It is the second build for most people, not a compulsory starting point.
What to expect
What the first attempts really involve
A keyboard is a compatibility stack. Size names such as 75% or TKL are only shorthand; the drawing, socket technology, key sizes and firmware support decide whether the parts actually work together.
Physical layout
ISO and ANSI change more than the Enter key. Bottom-row key widths, right Shift and navigation clusters can also vary, so compare a diagram rather than trusting a regional label alone.
Electrical system
Hot-swap protects the beginner from soldering, but sockets still bend switch pins and can be damaged by force. A switch that will not seat is a reason to stop and inspect.
Sound
Case material, plate, desk surface, keycaps, stabilisers and typing force affect sound alongside the switch. A single online sound test cannot predict an identical result.
Feel
Linear, tactile and clicky describe broad mechanisms, not quality grades. Spring weight and travel matter, and a switch that feels pleasant for one key may be tiring across a full working day.
Software
VIA or QMK support can make remapping powerful, but only for a board and firmware that genuinely support them. Never flash a file intended for a similar-looking model.
Fundamentals
Build the first attempt on reliable fundamentals
Write a compatibility sheet before ordering
Record the exact keyboard model, physical layout, number of keys, switch system, socket pin support, keycap profile and any unusual key widths. For a UK board, confirm that the keycap kit explicitly includes UK ISO legends and the required ISO keys. A product title saying “UK layout” is stronger evidence than a photograph that merely resembles one.
Treat the original board as a working reference
Test every key with an online key tester or the operating system before opening anything, then take a clear photograph. Unplug the cable or switch off wireless power before using pullers. Remove keycaps vertically, support the case and release both switch clips so the hot-swap socket is not used as a lever.
Inspect pins before pressure
Look at the two metal switch pins edge-on. They should be straight and parallel enough to enter the socket openings. Align the plastic locating pins and press on the switch housing, not the stem. If resistance feels wrong, withdraw it and check rather than increasing force; a folded pin is common and usually recoverable before it snaps.
Test in layers
Fit four or five switches without keycaps, reconnect the board and test the bare stems. Add the keycaps and test again. Continue in small groups, checking stabilised keys such as Space, Enter and Backspace separately. This makes one bent pin or misplaced cap obvious instead of hiding it among eighty changes.
Useful products
A known UK board, one switch choice and matching keycaps
The Keychron provides a complete UK ISO hot-swap reference, the Akko switches create a deliberate linear change and the SteelSeries set supplies confirmed UK-layout keycaps. The GTSP barebones kit is shown only as the later route where the builder is prepared to verify its ANSI-style layout and every remaining part.
Keychron V6 QMK Custom Mechanical Keyboard, UK ISO
It removes uncertainty about the PCB, stabilisers and original layout while retaining hot-swap and remapping.
Akko V3 Pro Cream Black Linear Switches, 45 pack
The pack is large enough for meaningful comparison and is a recurring accessible choice in custom keyboard builds.
SteelSeries PrismCaps Double Shot PBT Keycaps, UK Layout
It addresses the most common regional-layout mistake and changes surface feel without touching electronics.
First change
Replace one row on a working hot-swap board
Use five to ten compatible switches rather than stripping the whole board immediately. The aim is to learn removal, pin inspection and testing while most keys remain a reliable control group.
- 01
Confirm the exact layout
Compare the board with an ISO diagram, note every non-standard key width and check that the replacement caps and switches name the same system.
- 02
Test and photograph
Record a successful test of all keys and photograph the original cap positions before disconnecting power.
- 03
Choose a small row
Begin with ordinary letter or number keys, avoiding Space and other stabilised keys until the puller technique feels controlled.
- 04
Remove vertically
Pull keycaps straight up, then squeeze both switch latches and lift without rocking hard enough to stress the PCB socket.
- 05
Check every pin
Turn each new switch over under good light. Straighten a slightly bent pin carefully before it meets the socket.
- 06
Seat without force
Align the pins and locating posts, then press the housing evenly until the clips engage. Stop if the plate flexes or the switch sits proud.
- 07
Test before keycaps
Reconnect only after tools are clear, test the changed switch stems, disconnect again and investigate any missing press.
- 08
Fit and compare
Replace the keycaps in the photographed positions, then type the same paragraph on changed and unchanged rows to compare feel and sound.
Troubleshooting
Read the result before changing the setup
One dead key usually needs physical inspection
Disconnect the board, pull that switch and look for a folded metal pin. Try a known working switch in the same socket. If the known switch also fails, stop before repeatedly disturbing a possibly damaged hot-swap socket.
A keycap that catches may be the wrong size or row
Check the key width, profile row and neighbouring cap orientation. Do not file a new cap or force a stabilised key merely because the legend looks correct.
A remap problem is not fixed by more switches
Confirm the operating-system layout, factory layer and supported configuration tool. Export a working layout before editing and use only firmware named for the exact model and revision.
Unwanted sound has several sources
Move the keyboard to a desk mat, compare one key at a time and identify rattle, spring noise, case resonance or bottoming out. Lubrication and case foam can wait until the source is clear.
Skip for now
What can wait
A first modification should reveal preferences while preserving a dependable keyboard. These additions create more variables than useful feedback at the start.
- 01
Soldering switches
Hot-swap gives the same switch-selection lesson without a hot iron or lifted-pad risk. Learn soldering separately before choosing a solder-only PCB.
- 02
Hand-lubing an entire switch set
It is slow, easy to make inconsistent and can remove tactility when done badly. Use a few stock switches first and decide whether their actual behaviour needs changing.
- 03
Tape, foam and force-break modifications
They can alter sound and electrical conditions, but also complicate warranty and troubleshooting. Make a baseline recording before modifying the case.
- 04
A full barebones collection
One carefully specified second board is more useful than several cheap cases with incompatible plates, stabilisers or keycap layouts.
Upgrade path
What a better setup changes
Upgrades should answer a specific observation: a layout need, a preferred switch feel, unwanted stabiliser noise or a desire to programme layers.
Working hot-swap board
About £85–£120Complete UK ISO keyboard + stock switches and caps
Provides a dependable baseline and lets switches be compared without assembly faults.Deliberate switch and cap change
Add about £40–£70One full compatible switch set + confirmed layout keycaps
Changes feel, spring weight, surface texture and legends while retaining the known electronics.Barebones build
Often £100–£220 completeCase/PCB/plate + stabilisers + switches + exact keycap kit
Adds control over structure and acoustics, but makes the builder responsible for every interface.Soldered or firmware-heavy board
Varies widelyPCB project + soldering equipment + supported firmware workflow
Allows unusual layouts and deeper programming after assembly and recovery skills are established.Before upgrading
A useful check before spending more
Name the change in one sentence
“Lighter linear switches for long typing sessions” is a testable aim; “a better keyboard” is not. Choose the next part only after the sentence identifies feel, layout, sound or programming.
Recheck all four interfaces
Before paying, confirm physical layout, switch technology, keycap sizes and software support from the exact model documentation. Marketplace compatibility lists are useful leads, not substitutes for those checks.
Safety
Work safely from the first attempt
Hot-swap keyboard work is low risk when the board is powerless and force is controlled, but small parts, sharp switch pins and unsupported firmware still deserve care.
- Disconnect USB power and switch off wireless modes before inserting tools or switches.
- Keep loose switches, keycaps and screws away from children and pets; they are choking hazards.
- Support the case on a stable surface and keep pullers moving vertically rather than towards the face.
- Do not open a mains-powered charger or modify lithium batteries as part of a keyboard project.
- Back up working mappings and flash only files supplied for the exact board revision.
- Stop if a socket lifts, a cable tears or the battery is swollen; do not keep testing a damaged board.
Classes
When outside help is useful
A class is rarely needed for hot-swap customising. Community build meets become useful for trying switch types, comparing layouts and learning soldering on a practice board before an expensive PCB.
Best for trying many real boards and hearing them in the same room rather than trusting edited recordings.
Useful before a soldered custom board; look for through-hole practice, extraction and fault correction.
Representative UK meetup and makerspace formats checked 30 July 2026; events and included materials vary.
Sources
Sources and checking notes
Keyboard references establish layout, hot-swap and firmware boundaries; current UK community discussions reveal recurring ISO sourcing problems; direct listings confirm the exact products.
-
01
Keyboard University · Learning centre
Beginner explanations of keyboard components, layouts, switches and build decisions.
Open source -
02
VIA · Supported keyboards
Primary compatibility list for boards officially supported by VIA.
Open source -
03
QMK · Newbs guide
Official introduction to supported keyboard firmware, building and flashing.
Open source -
04
r/MechanicalKeyboardsUK · Current UK ISO resources
Current community discussion of UK ISO boards, keycaps and suppliers.
Open source -
05
r/MechanicalKeyboardsUK · ISO beginner guide
Long-running practical guide to UK ISO layout and compatibility.
Open source -
06
Amazon UK · V6 QMK Custom Mechanical Keyboard, UK ISO
Exact Keychron product and direct Amazon UK listing checked for current availability, price context and model identity.
Open source -
07
Amazon UK · V3 Pro Cream Black Linear Switches, 45 pack
Exact Akko product and direct Amazon UK listing checked for current availability, price context and model identity.
Open source -
08
Amazon UK · PrismCaps Double Shot PBT Keycaps, UK Layout
Exact SteelSeries product and direct Amazon UK listing checked for current availability, price context and model identity.
Open source -
09
Amazon UK · M87 75% Hot-swappable Barebones Keyboard Kit
Exact GTSP product and direct Amazon UK listing checked for current availability, price context and model identity.
Open source
Guide information and links checked 30 July 2026.