Beginner’s guide · Make & create
Press them flat.
Arrange them lightly.
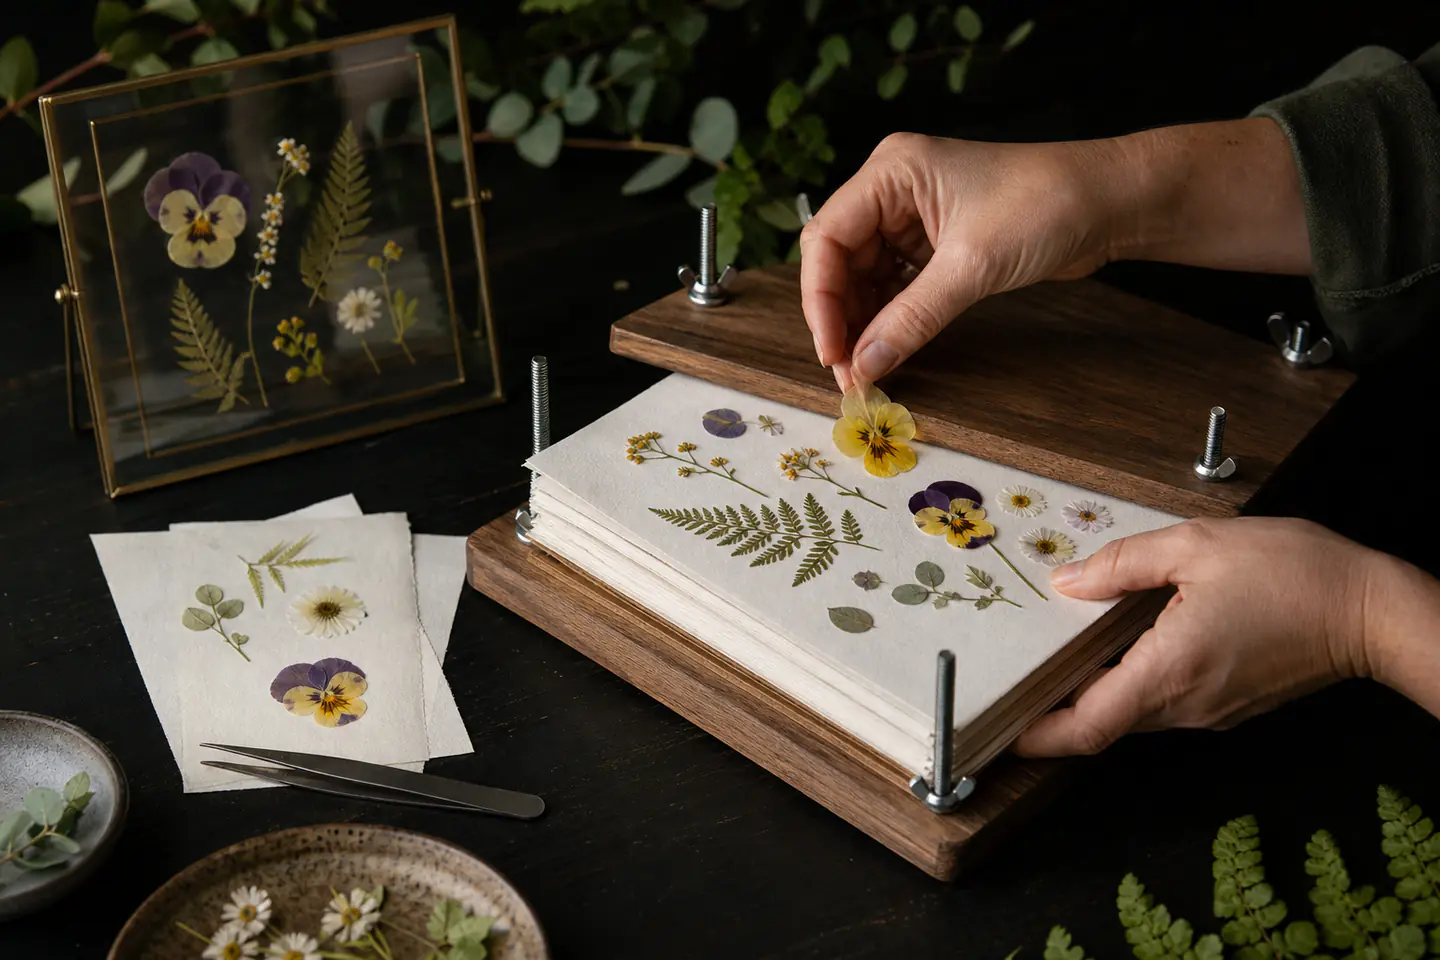
Start with thin, dry flowers and a traditional press. Once they are completely dry, use tweezers to build one small composition in a floating frame—without picking protected plants or trapping moisture behind glass.
Quick answer
Dry first; design later
Collect a few dry, clean flowers from a place where picking is permitted. Arrange them between absorbent sheets without overlap, tighten the press evenly and leave it in a dry room. Do not frame anything until the stems and centres feel completely dry.
- 01
Flat, low-moisture flowers and individual petals are more forgiving than fleshy blooms.
- 02
Place every specimen before closing the press; reopening it repeatedly can disturb delicate parts.
- 03
Check absorbent sheets if the material was damp or thick, and replace wet paper promptly.
- 04
Pressed colour naturally changes. Display finished work away from bright sunlight and humidity.
What to expect
The press records shape, moisture and timing
Good results come from choosing pressable material and removing moisture steadily—not from tightening a wet flower as hard as possible.
Shape
Petals move as the press closes. Side views, separated petals and small leaves often preserve a clearer silhouette than a thick flower pressed face-on.
Moisture
Fresh dew, rain and fleshy centres slow drying and increase mould risk. Collect after surface moisture has gone.
Colour
Some flowers darken or fade even when well pressed. That is a material property, not always a technique failure.
Fragility
A dry specimen can tear under fingers. Fine tweezers and a soft brush make positioning calmer.
Time
Two to four weeks is common, but thickness, paper, pressure and room humidity matter more than a calendar promise.
Pressing method
Choose specimens that can actually dry
Begin with thin material
Pansies, violas, small daisies, ferns, flat leaves and separated petals give a beginner a reasonable chance of even drying. Avoid thick roses, succulent leaves and juicy centres until there is a plan to split, deconstruct or pre-dry them.
Build absorbent layers
Place flowers between clean absorbent paper, then between the press boards and ventilation layers supplied. Keep petals separate and stems within the paper boundary. Tighten opposite corners gradually so pressure stays even rather than crushing one side first.
Let moisture leave
Keep the press somewhere dry with air around it—not in a sealed plastic bag or steamy kitchen. If paper becomes damp, replace it carefully with dry sheets. The specimen is ready only when it is papery and dry through the centre. A cool or flexible centre needs longer.
Starter products
A press does the drying; small tools finish the art
The wooden press is the core purchase. The floating frame is a first finished destination and the tweezers are a modest handling upgrade. Ordinary absorbent paper, a pencil and patience complete the setup.
Rhykoka Large Wooden Flower Press, 10 Layers
Its boards, screws and multiple layers create the steady pressure and absorbent stack used by the traditional method.
Homtone Double-Glass Floating Frame, 21 × 30 cm
The clear surround encourages a restrained composition and makes the result feel finished without resin.
MMOBIEL Seven-Piece Precision Tweezer Set
Fine tips make it easier to transfer and adjust small dried pieces in the frame.
First frame
Make one sparse floating composition
Use a small selection from the same pressing batch. Empty glass is part of the design.
- 01
Collect legally and dry
Take only a few common flowers from your own garden or with permission. Avoid protected sites and species; never uproot wild plants.
- 02
Record the material
Note the plant, place and date on the outside of the pressing sheet or in a notebook before the flower becomes hard to identify.
- 03
Arrange in the press
Open petals gently, remove damaged material and leave space between specimens. Tighten the boards evenly.
- 04
Wait until fully dry
Check only when necessary. Replace damp paper and return the press to a dry, ventilated room.
- 05
Design on backing paper
Test the arrangement on a sheet the size of the frame. Photograph it before transferring individual pieces.
- 06
Frame with restraint
Use tweezers and the smallest appropriate amount of archival adhesive if fixation is necessary. Close the clean dry frame and keep it out of direct sun.
Troubleshooting
Read the result before blaming the press
Brown is not automatically mould
Natural pigments change as flowers dry. Uniform darkening can be ordinary oxidation; fuzzy growth, spreading spots or a musty smell indicate a failed specimen. Discard mouldy material and replace contaminated paper rather than sealing it into art.
Pressure cannot solve trapped moisture
A thick centre may remain wet while the petals feel crisp. Split or remove bulky parts before the next attempt and press thinner components separately. Silica gel drying creates a different, three-dimensional result and is not required for this flat-art route.
Light keeps changing the work
Pressed flowers continue to fade. UV-filtering glazing may slow change but cannot freeze colour. Hang the work away from strong daylight, bathrooms and damp walls; treat the original as an organic artwork that will age.
Skip for now
What can wait
More preservation products do not rescue unsuitable or damp plant material.
- 01
A microwave press
It speeds drying but needs short controlled cycles and material-specific practice. Learn how flowers behave in a traditional press first.
- 02
Resin casting
Resin adds mixing, bubbles, curing chemistry and respiratory precautions. It also requires bone-dry material.
- 03
Large wedding-bouquet commissions
Sentimental, thick and time-critical material is a high-risk first job. Practise on ordinary flowers through several seasons.
- 04
UV sprays and sealers
Products can alter colour and still do not stop fading. Use only when the maker states compatibility and ventilation needs.
- 05
Rare wild specimens
A beautiful plant is not permission to pick it. Work with garden material, florist leftovers or common plants collected lawfully.
Upgrade path
Upgrade drying control before scale
A larger collection is useful only if each specimen remains labelled, dry and easy to find.
One small press
About £15–£25Wooden press + absorbent paper + thin flowers
Learn selection, placement, drying and natural colour change.Cleaner handling
About £5–£20Fine tweezers + soft brush + labelled packets
Move brittle petals and organise successful pieces with less damage.Repeatable collection
About £30–£80Larger press + replacement blotters + drying rack
Process more material while separating species and dates.Conservation-minded display
Frame dependentArchival mounts + suitable glazing + controlled display position
Reduce handling and slow, but never eliminate, light-driven fading.Safety
Collect and display responsibly
The main boundaries are legal collection, correct plant identification and keeping biological material dry.
- Collect only on your own land or with the landowner’s permission; protected plants and protected sites have additional legal restrictions.
- Never uproot a wild plant for this craft, and take only a small amount from abundant common growth.
- Do not handle an unknown plant that may irritate skin or be toxic; wash hands after collecting.
- Discard mouldy or pest-damaged material and clean the press before reusing it.
- Keep pressed plants away from food preparation, pets and small children who may ingest them.
- Use craft knives, glass frames, sprays and adhesives according to their own safety instructions.
Classes
When outside help is useful
A class is most useful for flower selection, composition feedback and specialised preservation rather than operating a basic screw press.
Bow Arts listed a hands-on pressed-flower session in this range, useful for trying composition with materials supplied.
A remote session can provide a materials list and live arrangement feedback without travel.
Higher-priced sessions make sense for advanced framing, wedding flowers or a supplied professional press.
Representative UK course pages and prices checked 27 July 2026; dates and included materials vary.
Sources
Where the guidance came from
Botanical-garden and RHS sources support the drying method; UK government guidance sets collection boundaries; community examples informed the mould and colour troubleshooting.
-
01
Royal Horticultural Society · Pressing flowers and leaves
Traditional paper-and-pressure method for leaves and flowers.
Open source -
02
Royal Horticultural Society · How to dry flowers and foliage
Material selection and alternative drying methods.
Open source -
03
Botanic Gardens of Sydney · Preserving plant specimens
Botanical specimen preparation, pressing and labelling.
Open source -
04
Chicago Botanic Garden · How to dry flowers
Practical advice on choosing and drying suitable blooms.
Open source -
05
GOV.UK · Wild plants: dangerous, invasive and protected species
Legal context for protected wild plants and collection.
Open source -
06
r/PressedFlowers · Beginner pressing discussion
Community experience around paper changes, mould and suitable flowers.
Open source -
07
Bow Arts · Pressed flowers workshop
Representative £20–£25 UK workshop.
Open source -
08
Pressed Floral Art · Workshops
Representative specialist card and full pressing workshop prices.
Open source -
09
Amazon UK · Rhykoka wooden flower press
Exact ten-layer 11.8 × 8.3 inch press; £17.89 observed and available.
Open source -
10
Amazon UK · Homtone double-glass floating frame
Exact 21 × 30 cm floating frame; £19.95 observed and available.
Open source -
11
Amazon UK · MMOBIEL precision tweezers
Exact seven-piece tweezer set; £6.49 observed and available.
Open source
Guide information and links checked 27 July 2026.