Beginner’s guide · Make & create
Prove one known material
inside a controlled enclosure.
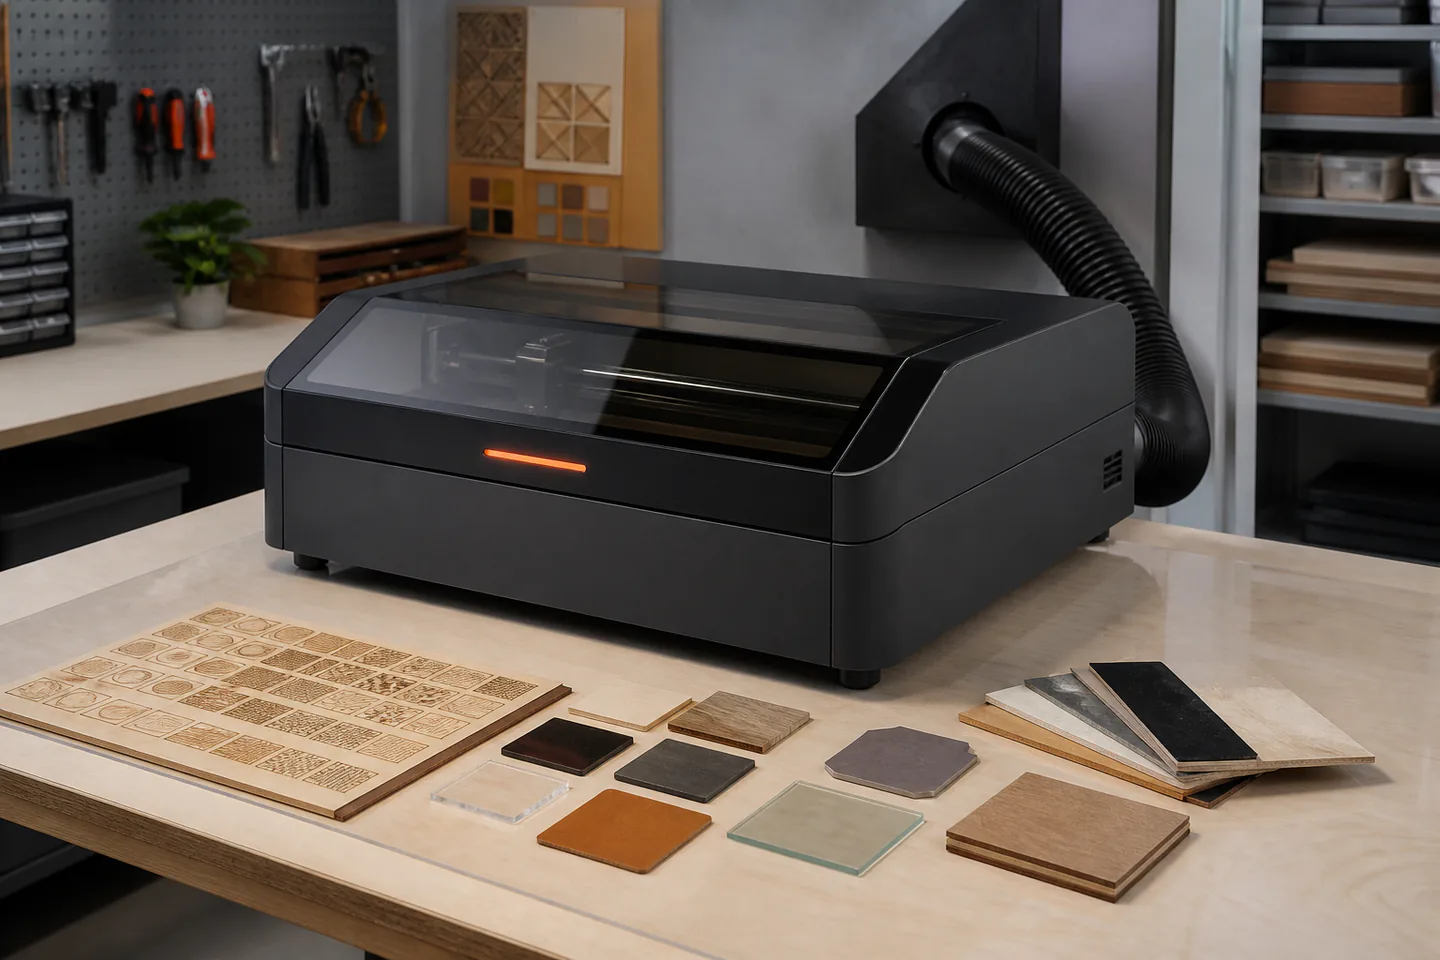
Laser engraving is a machine process built around enclosure, extraction, material identification, fire watch and repeatable test grids—not unattended novelty cutting.
Quick answer
Build one small, controlled result first
Use an enclosed interlocked machine from a supported manufacturer, vent it as specified and engrave only a positively identified approved material. Stay present through a small labelled test grid and record focus, power, speed and result.
- 01
Read the exact machine manual, extraction requirements, approved-material list, emergency stop and fire response before connecting or loading anything. Keep the first attempt narrow enough that preparation, the main action and the result can all be reviewed together.
- 02
Hold material, focus and design constant while changing only speed or power across a conservative manufacturer-led test grid. Keep the first attempt narrow enough that preparation, the main action and the result can all be reviewed together.
- 03
Stop for sustained flame, unexpected smoke, melting, odour, incomplete extraction or deposits on optics; a darker mark is not automatically better. Keep the first attempt narrow enough that preparation, the main action and the result can all be reviewed together.
- 04
Wait for smoke to clear, isolate as instructed, remove debris, inspect the bed and optics and log the material source and successful settings. Keep the first attempt narrow enough that preparation, the main action and the result can all be reviewed together.
What to expect
Accuracy comes from the sequence, not the size of the toolkit
Preparation, one controlled variable and an honest inspection matter more than collecting specialist equipment.
The first attempt
A small test grid on approved plywood or card is a complete first project because it proves the machine, extraction and recording workflow. For laser engraving, note what actually happened rather than relying on memory; that turns the next attempt into a controlled change instead of another guess.
The control point
Hold material, focus and design constant while changing only speed or power across a conservative manufacturer-led test grid. For laser engraving, note what actually happened rather than relying on memory; that turns the next attempt into a controlled change instead of another guess.
The useful signal
Stop for sustained flame, unexpected smoke, melting, odour, incomplete extraction or deposits on optics; a darker mark is not automatically better. For laser engraving, note what actually happened rather than relying on memory; that turns the next attempt into a controlled change instead of another guess.
The common trap
Unknown plastics, unattended runs and improvised open frames create chemical, optical and fire risks that better artwork cannot offset. For laser engraving, note what actually happened rather than relying on memory; that turns the next attempt into a controlled change instead of another guess.
Core method
Prepare, make, inspect and reset
Prepare deliberately
Read the exact machine manual, extraction requirements, approved-material list, emergency stop and fire response before connecting or loading anything. For laser engraving, note what actually happened rather than relying on memory; that turns the next attempt into a controlled change instead of another guess.
Control the central variable
Hold material, focus and design constant while changing only speed or power across a conservative manufacturer-led test grid. For laser engraving, note what actually happened rather than relying on memory; that turns the next attempt into a controlled change instead of another guess.
Read the result
Stop for sustained flame, unexpected smoke, melting, odour, incomplete extraction or deposits on optics; a darker mark is not automatically better. For laser engraving, note what actually happened rather than relying on memory; that turns the next attempt into a controlled change instead of another guess.
Reset before repeating
Wait for smoke to clear, isolate as instructed, remove debris, inspect the bed and optics and log the material source and successful settings. For laser engraving, note what actually happened rather than relying on memory; that turns the next attempt into a controlled change instead of another guess.
Useful products
Products with a clear job in the setup
The primary recommendation is a supported enclosed system with specified extraction and fire controls, chosen from current manufacturer documentation. These bench products are secondary aids, not safety substitutes.
Fiskars A3 Self-Healing Cutting Mat
The larger area keeps patterns and thin materials flat.
LIHAO 10-Piece Basic Model Building Tool Set
It covers the repetitive hand work shared by models and miniatures.
3M SecureFit 200 Safety Glasses
Comfortable glasses are easier to keep on for every cut and cleanup.
First project
Engrave and label one conservative test grid
Use a manufacturer-approved sample and remain beside the machine from start to cooled cleanup.
- 01
Set up
Read the exact machine manual, extraction requirements, approved-material list, emergency stop and fire response before connecting or loading anything. For laser engraving, note what actually happened rather than relying on memory; that turns the next attempt into a controlled change instead of another guess.
- 02
Begin the first attempt
A small test grid on approved plywood or card is a complete first project because it proves the machine, extraction and recording workflow. For laser engraving, note what actually happened rather than relying on memory; that turns the next attempt into a controlled change instead of another guess.
- 03
Hold one variable steady
Hold material, focus and design constant while changing only speed or power across a conservative manufacturer-led test grid. For laser engraving, note what actually happened rather than relying on memory; that turns the next attempt into a controlled change instead of another guess.
- 04
Inspect the result
Stop for sustained flame, unexpected smoke, melting, odour, incomplete extraction or deposits on optics; a darker mark is not automatically better. For laser engraving, note what actually happened rather than relying on memory; that turns the next attempt into a controlled change instead of another guess.
- 05
Reset and record
Wait for smoke to clear, isolate as instructed, remove debris, inspect the bed and optics and log the material source and successful settings. For laser engraving, note what actually happened rather than relying on memory; that turns the next attempt into a controlled change instead of another guess.
What can wait
What can wait until the first result
Delay equipment that solves no repeated problem in the first small project.
- 01
A large first setup
Scale multiplies Unknown plastics, unattended runs and improvised open frames create chemical, optical and fire risks that better artwork cannot offset. before the basic routine is known. For laser engraving, note what actually happened rather than relying on memory; that turns the next attempt into a controlled change instead of another guess.
- 02
Premium specialist equipment
It should solve a limitation you can describe after several laser engraving sessions. For laser engraving, note what actually happened rather than relying on memory; that turns the next attempt into a controlled change instead of another guess.
- 03
Several methods at once
Changing materials and technique together makes the cause of a result hard to see. For laser engraving, note what actually happened rather than relying on memory; that turns the next attempt into a controlled change instead of another guess.
- 04
Buying for a future version
Finish and review the small route before equipping an imagined advanced practice. For laser engraving, note what actually happened rather than relying on memory; that turns the next attempt into a controlled change instead of another guess.
Upgrade path
Upgrade the repeated limitation
Add capacity only after the basic process is repeatable.
Try it
About £500–£2,000 for a safer supported routeSupervised makerspace session
Complete one meaningful result and learn the whole sequence.Repeat it
About £500–£2,000 for a safer supported routeEnclosed machine and specified extraction
Reduce setup friction and compare several attempts.Improve the bottleneck
£700–£3,000+Air assist or filtration approved for the machine
Address Unknown plastics, unattended runs and improvised open frames create chemical, optical and fire risks that better artwork cannot offset. with a targeted change.Go deeper
VariableDocumented material library and maintained production workflow
Add scale, precision or public participation with evidence from practice.Safety & care
The enclosure and extraction are part of the tool
Laser radiation, fire and decomposition products require engineered controls and constant supervision.
- Never process PVC, vinyl, unknown plastics, treated timber or any material the manufacturer does not approve. Follow current manufacturer, food-safety, access, wildlife or local guidance wherever it applies.
- Keep lids, interlocks, extraction and emergency controls functioning; do not bypass them. Follow current manufacturer, food-safety, access, wildlife or local guidance wherever it applies.
- Remain present and attentive for every run with the specified fire response equipment immediately available. Follow current manufacturer, food-safety, access, wildlife or local guidance wherever it applies.
- Use wavelength-specific protective eyewear only when the manufacturer’s risk assessment requires it; ordinary safety glasses are not laser protection. Follow current manufacturer, food-safety, access, wildlife or local guidance wherever it applies.
- Follow local fire, ventilation, electrical and workplace requirements and keep maintenance records. Follow current manufacturer, food-safety, access, wildlife or local guidance wherever it applies.
Outside help
When outside help earns its place
A supervised makerspace induction is the sensible first route because it teaches machine-specific controls, extraction and fire procedure on maintained equipment.
Use one complete lesson that covers preparation, the central technique, common mistakes and finishing. For a first laser engraving attempt, one coherent method is easier to diagnose than fragments collected from several creators.
Outside help earns its place when safe setup, access, identification or live correction removes a real obstacle. Ask what equipment, materials, access and follow-up support are included before booking.
Representative UK learning options checked 31 August 2026; local prices, access, materials and tutor support vary.
Sources
Where the guidance came from
The method is grounded in specialist, manufacturer and public guidance, then checked against recurring beginner problems and the exact products linked here.
-
01
Health and Safety Executive · Optical radiation
UK optical-radiation safety context.
Open source -
02
Trotec · Materials guide
Manufacturer material compatibility and exclusions.
Open source -
03
Glowforge · Safety
Enclosure, material, ventilation and fire guidance.
Open source -
04
xTool · Safety Center
Manufacturer safety and material guidance.
Open source -
05
Reddit · r/lasercutting
Community evidence on extraction, materials, fires and maintenance.
Open source -
06
Amazon UK · A3 Self-Healing Cutting Mat
Exact Amazon UK product page or ISBN used for the recommendation; current price, seller, specification and availability should be confirmed.
Open source -
07
Amazon UK · 10-Piece Basic Model Building Tool Set
Exact Amazon UK product page or ISBN used for the recommendation; current price, seller, specification and availability should be confirmed.
Open source -
08
Amazon UK · SecureFit 200 Safety Glasses
Exact Amazon UK product page or ISBN used for the recommendation; current price, seller, specification and availability should be confirmed.
Open source
Guide information and links checked 31 August 2026.