Beginner’s guide · Make & build
Start kumiko woodworking with one result,
then improve the control that made it work.
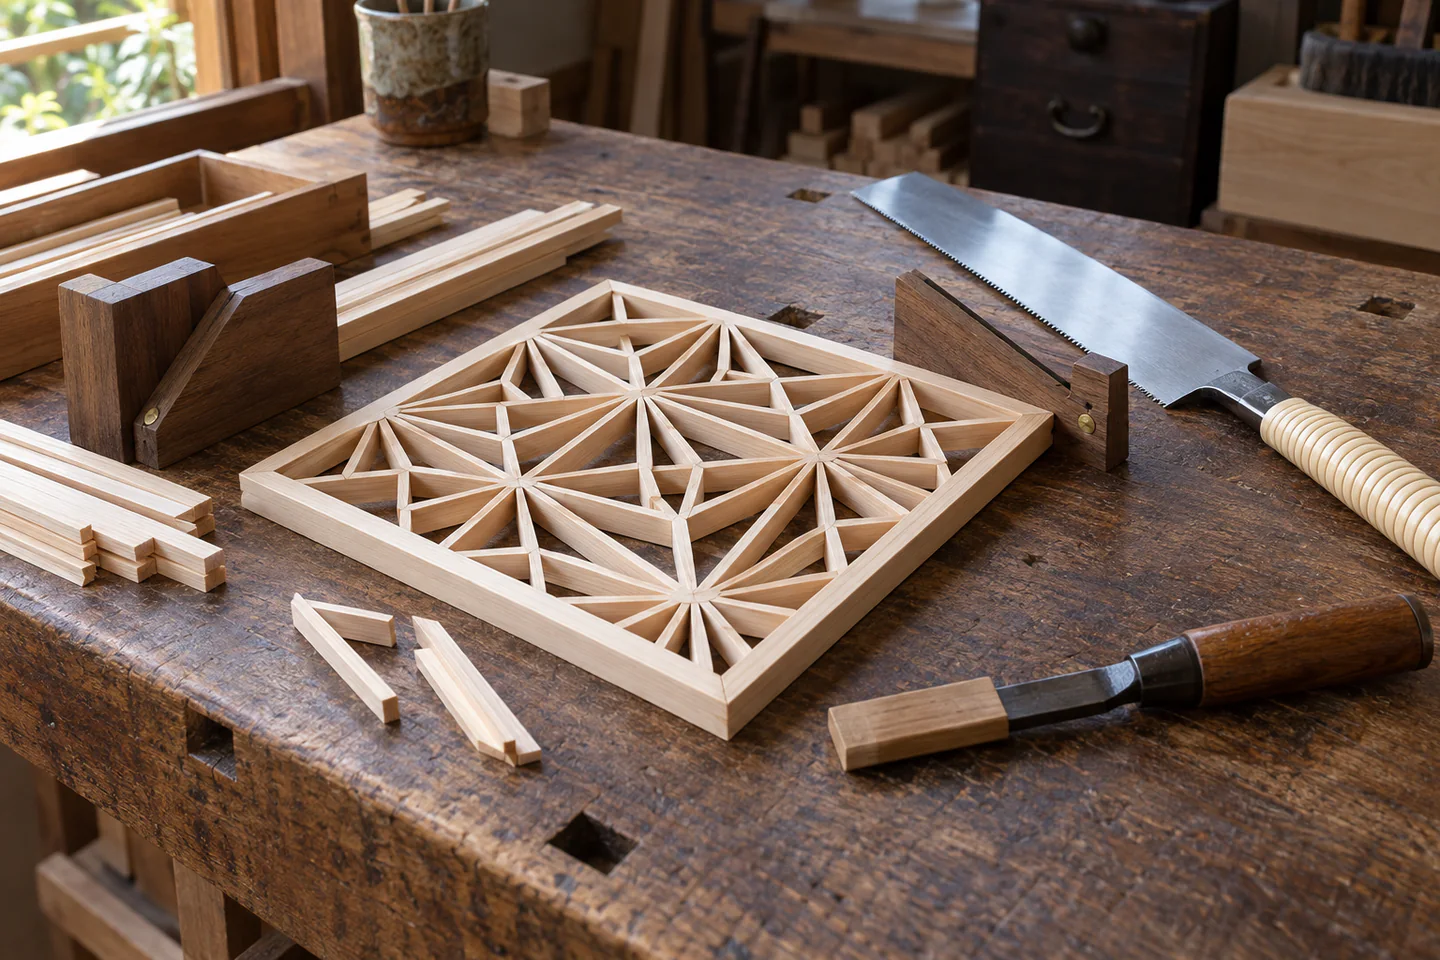
Start with prepared strips or a matched kit and one small geometric panel. Build a square outer frame, make a simple grid, tune every infill piece with a jig and dry-fit the complete pattern before applying any adhesive.
Quick answer
Make one small geometric kumiko panel before expanding the setup
Start with prepared strips or a matched kit and one small geometric panel. Build a square outer frame, make a simple grid, tune every infill piece with a jig and dry-fit the complete pattern before applying any adhesive.
- 01
Accuracy comes from repeatable jigs, not freehand correction. For the first kumiko woodworking session, keep the core material fixed and note the material, measurement and sequence before changing anything. Photograph or measure the result, because a visible record separates a technique problem from a tool or setup problem and makes the next attempt genuinely comparable.
- 02
Strip thickness must remain consistent through the whole panel. For the first kumiko woodworking session, keep the working position fixed and note the material, measurement and sequence before changing anything. Photograph or measure the result, because a visible record separates a technique problem from a tool or setup problem and makes the next attempt genuinely comparable.
- 03
Friction fits should seat without crushing fragile fibres. For the first kumiko woodworking session, keep one repeatable measurement fixed and note the material, measurement and sequence before changing anything. Photograph or measure the result, because a visible record separates a technique problem from a tool or setup problem and makes the next attempt genuinely comparable.
- 04
Dry fitting exposes cumulative error before glue makes it permanent. For the first kumiko woodworking session, keep the finishing sequence fixed and note the material, measurement and sequence before changing anything. Photograph or measure the result, because a visible record separates a technique problem from a tool or setup problem and makes the next attempt genuinely comparable.
What to expect
What kumiko woodworking is really like at the start
The useful beginner controls are preparation, a repeatable movement and a finished sample. Producing repeatable strips and precise bevels is the main skill to observe before adding scale, speed or decoration.
Materials and setup
Tiny angle errors multiply across a repeating pattern. For the first kumiko woodworking session, keep one material batch fixed and note the material, measurement and sequence before changing anything. Photograph or measure the result, because a visible record separates a technique problem from a tool or setup problem and makes the next attempt genuinely comparable.
Control that matters
Soft straight-grained timber is forgiving but still splits across short grain. For the first kumiko woodworking session, keep one tool setting fixed and note the material, measurement and sequence before changing anything. Photograph or measure the result, because a visible record separates a technique problem from a tool or setup problem and makes the next attempt genuinely comparable.
Common early failure
A sharp chisel or plane leaves a cleaner fit than sanding alone. For the first kumiko woodworking session, keep one small test fixed and note the material, measurement and sequence before changing anything. Photograph or measure the result, because a visible record separates a technique problem from a tool or setup problem and makes the next attempt genuinely comparable.
A useful finish
The outer frame controls whether the lattice stays square. For the first kumiko woodworking session, keep the same inspection method fixed and note the material, measurement and sequence before changing anything. Photograph or measure the result, because a visible record separates a technique problem from a tool or setup problem and makes the next attempt genuinely comparable.
Core method
The core kumiko woodworking method
Prepare
Check every prepared strip for thickness and straightness. For the first kumiko woodworking session, keep the preparation checklist fixed and note the material, measurement and sequence before changing anything. Photograph or measure the result, because a visible record separates a technique problem from a tool or setup problem and makes the next attempt genuinely comparable.
Establish the first reference
Build and measure a small square grid in a flat frame. For the first kumiko woodworking session, keep the first reference point fixed and note the material, measurement and sequence before changing anything. Photograph or measure the result, because a visible record separates a technique problem from a tool or setup problem and makes the next attempt genuinely comparable.
Build the result
Use a stop jig to cut repeated infill angles safely. For the first kumiko woodworking session, keep the working rhythm fixed and note the material, measurement and sequence before changing anything. Photograph or measure the result, because a visible record separates a technique problem from a tool or setup problem and makes the next attempt genuinely comparable.
Inspect before finishing
Tune one piece at a time and dry-fit from the centre outward. For the first kumiko woodworking session, keep the inspection light fixed and note the material, measurement and sequence before changing anything. Photograph or measure the result, because a visible record separates a technique problem from a tool or setup problem and makes the next attempt genuinely comparable.
Useful products
Products with a clear job in the route
Each recommendation covers a distinct practical job. Existing equipment is preferable when it meets the same specification; live price, stock, seller and compatibility still need checking before purchase.
Kynup Digital Caliper, 150 mm
Digital Caliper, 150 mm has a defined job in the kumiko woodworking route and can be compared with owned equipment against the same specification.
Spear & Jackson Predator 10-Inch Tenon Saw
Predator 10-Inch Tenon Saw has a defined job in the kumiko woodworking route and can be compared with owned equipment against the same specification.
IRWIN Quick-Grip 300 mm Clamps, Twin Pack
Quick-Grip 300 mm Clamps, Twin Pack has a defined job in the kumiko woodworking route and can be compared with owned equipment against the same specification.
First project
Make a small geometric kumiko panel
Keep this kumiko woodworking project small enough to finish, inspect and repeat. The first result is evidence about material compatibility, sequence and control rather than a performance test.
- 01
Set the boundary
Check every prepared strip for thickness and straightness. For the first kumiko woodworking session, keep the project size fixed and note the material, measurement and sequence before changing anything. Photograph or measure the result, because a visible record separates a technique problem from a tool or setup problem and makes the next attempt genuinely comparable.
- 02
Prepare the setup
Build and measure a small square grid in a flat frame. For the first kumiko woodworking session, keep the setup order fixed and note the material, measurement and sequence before changing anything. Photograph or measure the result, because a visible record separates a technique problem from a tool or setup problem and makes the next attempt genuinely comparable.
- 03
Make the controlled pass
Use a stop jig to cut repeated infill angles safely. For the first kumiko woodworking session, keep the central movement fixed and note the material, measurement and sequence before changing anything. Photograph or measure the result, because a visible record separates a technique problem from a tool or setup problem and makes the next attempt genuinely comparable.
- 04
Inspect and correct
Tune one piece at a time and dry-fit from the centre outward. For the first kumiko woodworking session, keep one correction rule fixed and note the material, measurement and sequence before changing anything. Photograph or measure the result, because a visible record separates a technique problem from a tool or setup problem and makes the next attempt genuinely comparable.
- 05
Finish and record
Photograph the dry fit, then glue sparingly and press flat. For the first kumiko woodworking session, keep the final measurement fixed and note the material, measurement and sequence before changing anything. Photograph or measure the result, because a visible record separates a technique problem from a tool or setup problem and makes the next attempt genuinely comparable.
What can wait
What can wait until the first result
Delay anything that adds cost, risk or another variable before the basic workflow has produced something you can review.
- 01
Milling strips from rough timber
This adds material complexity before the central technique is stable. For the first kumiko woodworking session, keep the original material fixed and note the material, measurement and sequence before changing anything. Photograph or measure the result, because a visible record separates a technique problem from a tool or setup problem and makes the next attempt genuinely comparable.
- 02
Large wall panels
This adds extra equipment before the central technique is stable. For the first kumiko woodworking session, keep the starter tools fixed and note the material, measurement and sequence before changing anything. Photograph or measure the result, because a visible record separates a technique problem from a tool or setup problem and makes the next attempt genuinely comparable.
- 03
Complex multi-angle motifs
This adds a harder judgement before the central technique is stable. For the first kumiko woodworking session, keep the first quality standard fixed and note the material, measurement and sequence before changing anything. Photograph or measure the result, because a visible record separates a technique problem from a tool or setup problem and makes the next attempt genuinely comparable.
- 04
Power-sanding tiny parts
This adds more scale or consequence before the central technique is stable. For the first kumiko woodworking session, keep the same project size fixed and note the material, measurement and sequence before changing anything. Photograph or measure the result, because a visible record separates a technique problem from a tool or setup problem and makes the next attempt genuinely comparable.
Upgrade path
Add only the capability you can now name
Each stage should remove a demonstrated limitation rather than simply make the setup look more advanced.
First controlled sample
Use owned tools where suitableComplete and annotate the small geometric kumiko panel.
Learn the central movement and material behaviour.Repeatable starter setup
About £20–£80 beyond the startRepeat the complete route with the same materials.
Confirm that the result can be repeated with fewer corrections.One selected capability
About £50–£250 where justifiedChoose one tool, class or material that answers a recorded limitation.
Expand one deliberate dimension: size, finish, speed or design.Independent specialist work
Cost depends on workspace and ambitionDevelop original work with testing, provenance and appropriate safety.
Plan, document and maintain a reliable personal workflow.Safety & care
Safety, care and respectful practice in kumiko woodworking
The practical risks remain manageable when access, tools, materials and legal boundaries are specific and proportionate.
- Use a bench hook, jig or clamp rather than holding short parts near a blade. For the first kumiko woodworking session, keep the stated safety control fixed and note the material, measurement and sequence before changing anything. Photograph or measure the result, because a visible record separates a technique problem from a tool or setup problem and makes the next attempt genuinely comparable.
- Keep chisels and saws sharp, covered and directed away from the body. For the first kumiko woodworking session, keep the smallest practical setup fixed and note the material, measurement and sequence before changing anything. Photograph or measure the result, because a visible record separates a technique problem from a tool or setup problem and makes the next attempt genuinely comparable.
- Wear eye protection for cutting and control fine wood dust. For the first kumiko woodworking session, keep the manufacturer or organiser instructions fixed and note the material, measurement and sequence before changing anything. Photograph or measure the result, because a visible record separates a technique problem from a tool or setup problem and makes the next attempt genuinely comparable.
- Reject split or bowed strips before they fail during fitting. For the first kumiko woodworking session, keep a stop condition fixed and note the material, measurement and sequence before changing anything. Photograph or measure the result, because a visible record separates a technique problem from a tool or setup problem and makes the next attempt genuinely comparable.
- Use minimal compatible adhesive and ventilate during finishing. For the first kumiko woodworking session, keep safe storage and cleanup fixed and note the material, measurement and sequence before changing anything. Photograph or measure the result, because a visible record separates a technique problem from a tool or setup problem and makes the next attempt genuinely comparable.
Outside help
When outside help earns its place
A guided session is useful when equipment setup, heat, sharp tools, field access or live correction blocks safe progress. A coherent authoritative source is enough for the smallest kumiko woodworking sample.
Choose one lesson that covers preparation, the central kumiko woodworking method, finishing and common mistakes in a single sequence.
Ask what materials and access are included, whether the project can be finished in the session and what safety instruction is provided.
Representative UK learning and access routes checked 2026-09-22; local prices, equipment and tutor support vary.
Sources
Where the guidance came from
Authoritative and specialist guidance supports the method, terminology and safety boundaries. Community discussion contributes recurring beginner problems rather than unsupported factual claims.
-
01
HSE · Woodworking
UK workshop risk, dust and machinery guidance.
Open source -
02
Woodland Trust · Managing woods
Woodland management and material context.
Open source -
03
Forestry Commission · Coppicing
Current UK coppice-management guidance.
Open source -
04
Heritage Crafts · Craft inventory
Traditional craft skills and practitioner context.
Open source -
05
Woodworkers Institute
UK project and technique guidance.
Open source -
06
Men’s Sheds Association
Shared-workshop and local learning routes.
Open source -
07
Reddit · r/woodworking
Recurring beginner evidence on workholding, grain and finishing.
Open source -
08
Kumiko Woodworking · Tools
Specialist overview of kumiko tools.
Open source -
09
Mokko Wood Studio · Foundation course
Structured kumiko learning route.
Open source -
10
Amazon UK · Digital Caliper, 150 mm
Exact product page used to identify B09964YBMF; confirm price, stock, seller and specification before ordering.
Open source -
11
Amazon UK · Predator 10-Inch Tenon Saw
Exact product page used to identify B0043YJB4K; confirm price, stock, seller and specification before ordering.
Open source -
12
Amazon UK · Quick-Grip 300 mm Clamps, Twin Pack
Exact product page used to identify B001DZQ3HA; confirm price, stock, seller and specification before ordering.
Open source
Guide information and links checked 22 September 2026.